Play Games
 4 months ago
181
4 months ago
181
The Elegoo Neptune 4 Max is the newest and largest build volume FDM (Fused Deposition Modeling) printer in the current Elegoo lineup. The transition to Klipper and the new features that change enables create the potential for huge leaps in capability. With new printers like the Neptune 4 Max, hobby 3D printing is making big leaps in 2023.
Here on the Tabletop side of GamingTrend we are interested in gear and technology that can enhance the tabletop gaming experience. 3D printing has huge potential across almost all aspects of the tabletop space. This review will be grounded in that context. How easy is the printer to use for someone that wants to enhance their tabletop games without necessarily wanting to add printing as a hobby of its own? Does the printer require experience to set up and use or can a novice get it up and running? Is it suitable for printing things like game inserts, terrain, or miniatures? These are the things I looked at for this review. I will not be covering things like the ability to print production quality parts, exotic materials, or tuning for peak performance.
Features
The Neptune 4 Max is a Cartesian FDM printer that runs on Klipper. For those not versed in 3D printer terminology, that means that all 3 axes move in order to print. The bed moves in the y axis, the print head moves in the x and z axes. FDM is the method of printing where a roll of plastic is fed into a hot nozzle and melted as the printer moves around depositing plastic in the pattern that you have programmed. Klipper is essentially the operating system. It is what enables the printer to read the G-code your slicer creates and convert that into the motions that the printer executes. The Neptune 4 series makes the jump from Marlin to Klipper. Klipper is a big upgrade but in simple terms, it enables significantly faster speeds and enhanced functionality and control.
The main attraction of Klipper for most users is the faster speed. We all want to print faster so we can print more. That table sized town you want to print for your D&D game isn’t going to print itself. The Neptune 4 Max has an advertised speed of up to 500mm/s. That is blazing fast when compared to the average speed of most marlin printers of around 60-100mm/s. Not so fast though…. This is a case of just because you can, doesn’t mean you should. I will talk more about speed later in the review, but for now, realistic speeds are more in the range of 100-200mm/s. That’s still fast but don’t let the 500mm/s give you unrealistic expectations.
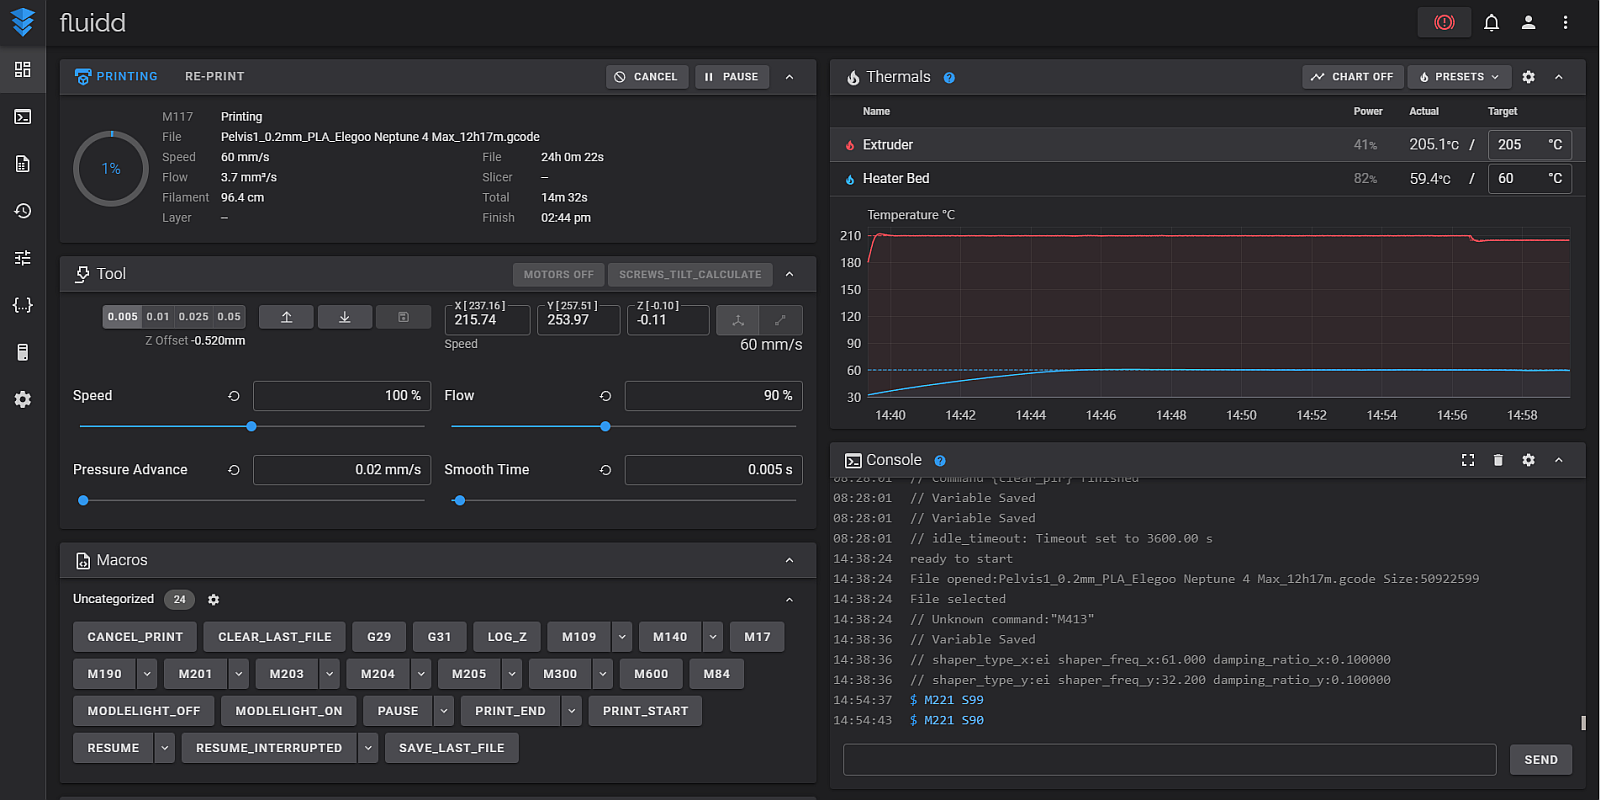
Fluidd interface
Besides speed, Klipper gives you much more control and easy access to your printer’s settings than Marlin. If you connect your printer to the internet, you can copy the printer’s IP address into your web browser and access Fluidd. Fluidd is a control interface that lets you access the underlying Klipper programming. From the home screen you can directly control your printer, send commands, get temperature data, and start and monitor prints in real time. This is also where you can see the bed level mesh from the auto leveling, change the printer configuration data, and even see data and processing loads on the printer’s hardware.
Elegoo offers several options in the Neptune 4 line of printers. If you are looking at the Max, you probably want to print BIG stuff. At 420x420x480mm the build volume available to you on the Max is just massive. For tabletop, you can print all of those big terrain pieces you want for TTRPGs or war games without having to split prints into multiple pieces. Entire buildings, castles, mountains, whatever you can think of, will fit in the build plate with ease. On the other end of the spectrum, miniatures are just as possible. A printer this large isn’t the most efficient if you’re printing minis, but if you are only going to have one printer, the Max is just as capable as a smaller printer of banging out minis. Keep in mind the limitation of FDM when printing minis compared to a resin printer. The loss of details and trouble with thin parts like weapons is still present if you are trying to print standard 28mm or 32mm size minis. Larger statue sized sculpts are more forgiving. If you’re into cosplay, which I will consider tabletop adjacent, the Max offers the space to print things like helmets and chest pieces in one shot rather than having to cut them up which will save you a lot of time in post processing.
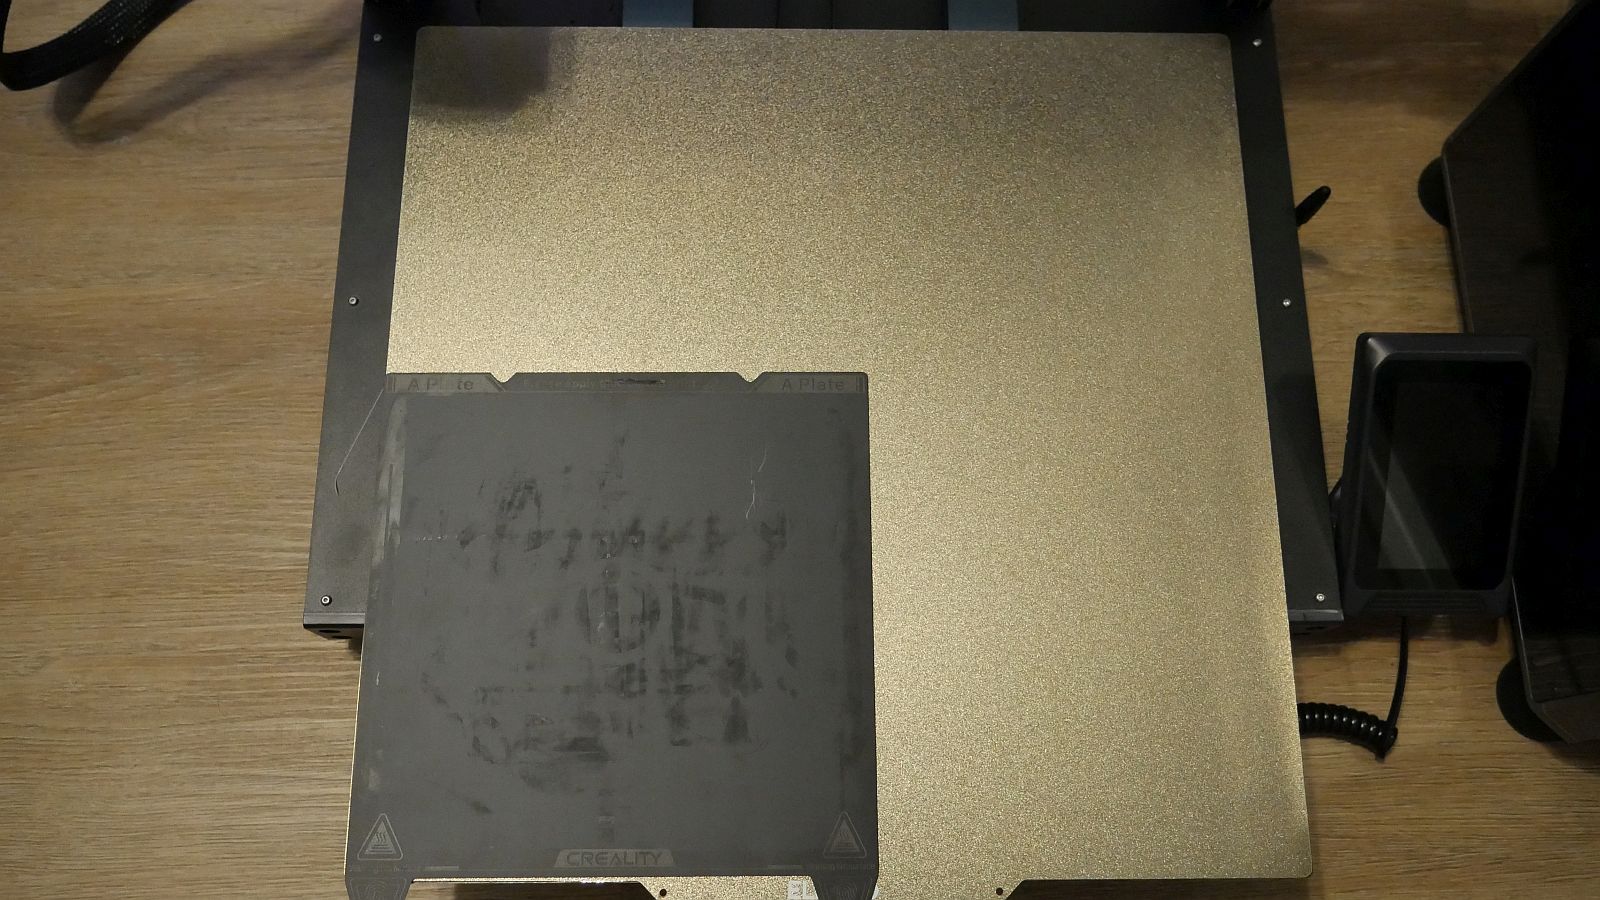
Build plate comparison
The Neptune 4 Max includes a number of upgrades and nice to haves that have become standard on printers coming out this year. The 4 Max includes a WI-FI antenna that you won’t find on the other Neptune 4 series printers. WI-FI is a great feature to have combined with Klipper since the printer can be controlled from your PC and prints sent directly to it without having to transfer files with a USB or SD card.
You will also get a filament runout sensor, sensorless homing, an auxiliary part cooling fan, USB capability, and a touch screen controller.
- A filament runout sensor is a necessity on a large format printer like this since you can easily print pieces that may use more than an entire roll of filament. The printer will detect when the roll runs out and automatically pause the print and wait for you to refill it.
- Sensorless homing is more of a nice to have than a necessity. It has less moving parts and switches to worry about and works with the enhanced capabilities of Klipper by detecting feedback on the stepper motors when you hit the end stops. This relies on some coding and calibration which should be sorted out via the installed firmware.
- The 4 Max features an enormous auxiliary part cooling fan mounted to the X gantry. For a lot of prints, it’s not really necessary to use, but if you are trying to print as fast as possible, the extra cooling can be the difference between success and failure.
- USB capability is another nice to have. If you are not using the WI-FI, then transferring via a USB is simply more convenient than fiddling with micro SD cards and adaptors.
- The touch screen controller attaches to the printer magnetically and has a flexible cord that allows you to pick the screen up and move it around. This may be especially useful depending on where you have your printer setup. The screen is quick and responsive to touch and fairly user friendly.
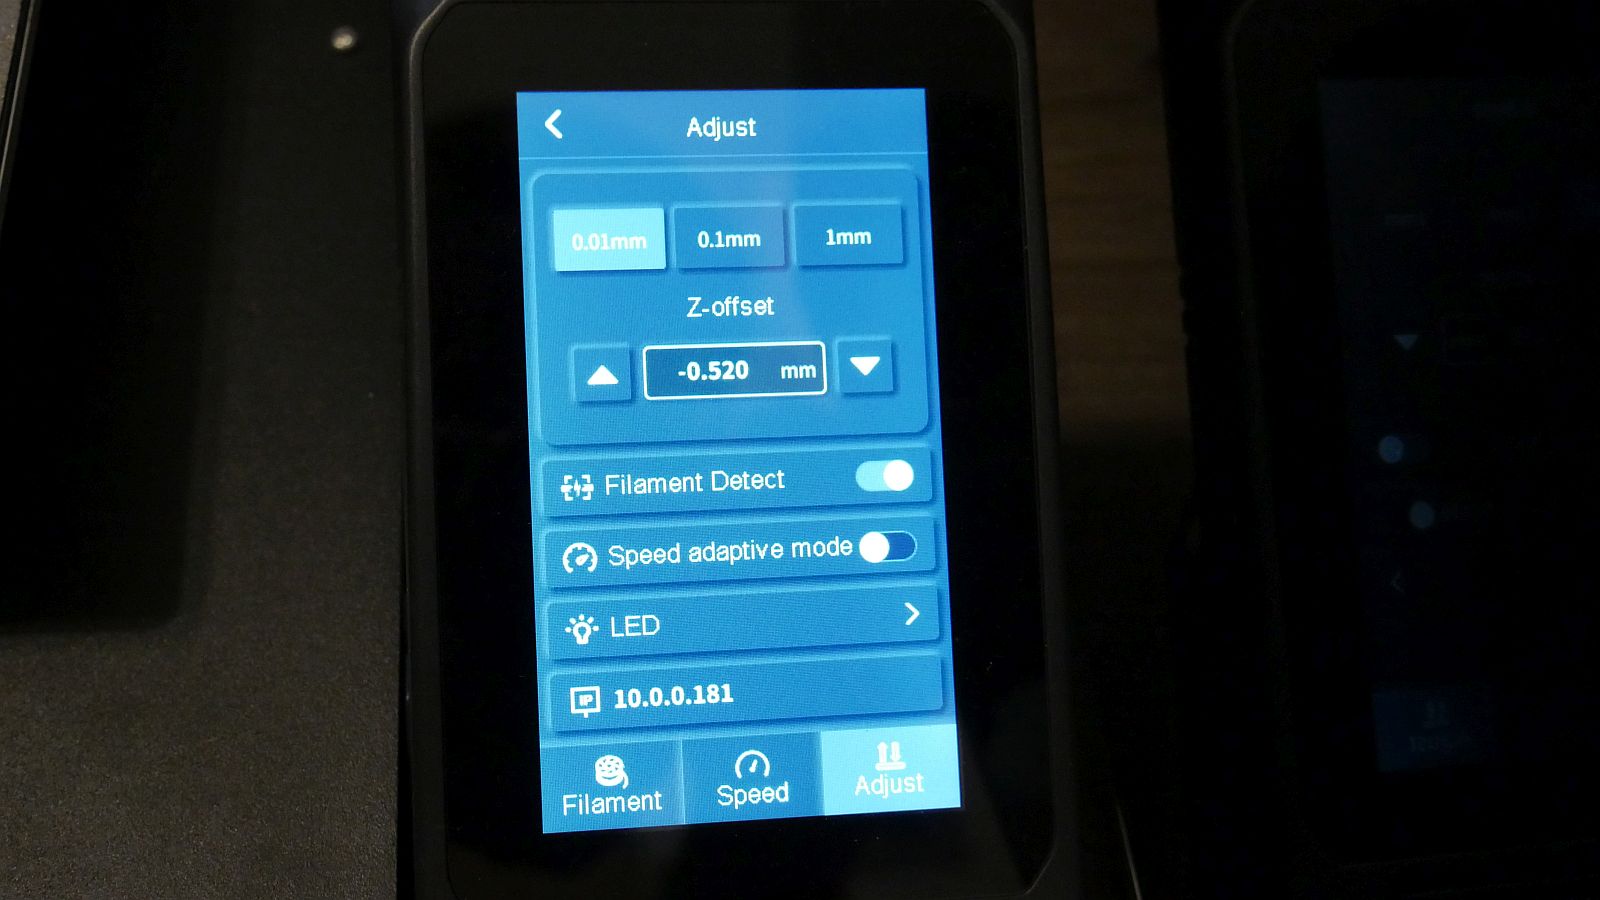
Touch screen controller
Set-up and Calibration
If you make the decision to acquire a Neptune 4 Max there is a bit of setup involved. The printer comes in a massive box which has several sub assemblies inside, similar to most other bed slinger style printers on the market. Everything is packed well in custom foam packing so you can be confident everything is going to arrive safely barring some kind of major accident during shipping. The Z gantry, or vertical frame, bolts easily onto the base with just four bolts. This is followed by a pair of additional support bars that keep that tall Z axis from tilting or vibrating independently from the rest of the printer. The print head needs to be attached to the X gantry and the filament runout sensor bolts on top. Finally, the touch screen controller bolts to the side and all of the motors can be hooked up. The electrical connections are all clearly labeled so this part is really easy. Be sure to also check that you’ve switched the power supply to the correct voltage for your country. The switch is recessed into the aluminum extrusion on the left side of the printer and easy to miss. The included set up instructions are easy to understand if you’ve set up a printer of this style before but may be lacking detail if this is your first time. Fortunately, there are a number of resources available on Youtube for you to follow along with if you get stuck.
Once you have the printer assembled, there is still a bit of work to be done. Calibrating the Neptune 4 Max is pretty straightforward, at least in theory. I will get to some of the complications that I experienced in a later section. Calibrating the printer is important to achieve good results and the Neptune 4 Max requires the user to manually run several calibrations. No automatic calibration button that runs everything for you here.
- PID Tuning: This calibrates the temperature sensors for the nozzle and bed. You need to PID tune each individually. On the Neptune 4 Max, this is very easily done right from the controller.
- Bed Level: Even though the printer has what most people call “auto” leveling, the bed still needs to be manually leveled when you set it up. This involves moving the print head around to different positions and adjusting the leveling wheels under the bed to try and get it as flat as possible. The controller has a built-in manual level process that will move the print head around for you, but doesn’t give you any readouts for actual differences in the bed. Fortunately there are tools built into Klipper that will give you readouts at each position and even tell you how much to rotate each bed level knob if you run it from the Fluidd interface.
- E-Steps: This controls how fast your extruder wheels rotate to push filament into the nozzle. Different materials and even different brands of the same material can require different E-Step values. If you have used Marlin printers before, the E-Steps calibration is a little more complicated with Klipper. You actually have to calibrate rotational distance and use two formulas to find the correct values. You will need to go into Fluidd and open the printer config file to pull the current values and edit them after the calibration. This is one where I would recommend finding a tutorial on YouTube.
- Pressure Advance: Depending on your current setting, your prints may have bulging corners or under extruded corners. Pressure advance compensates for the oozing as the printer slows down to round corners and when properly tuned gives you nice sharp corners. There is no built-in calibration for this one. I would recommend checking Teaching Techs calibration website and running his provided test. The test itself is easy and only requires some calipers to measure the model afterwards.
- Input Shaping: The high speeds Klipper enables tend to cause a lot of vibration. Input Shaping attempts to compensate for that vibration. This is another easy one to do straight from the controller on the Neptune 4 Max. Just tap the button and wait for it to finish.
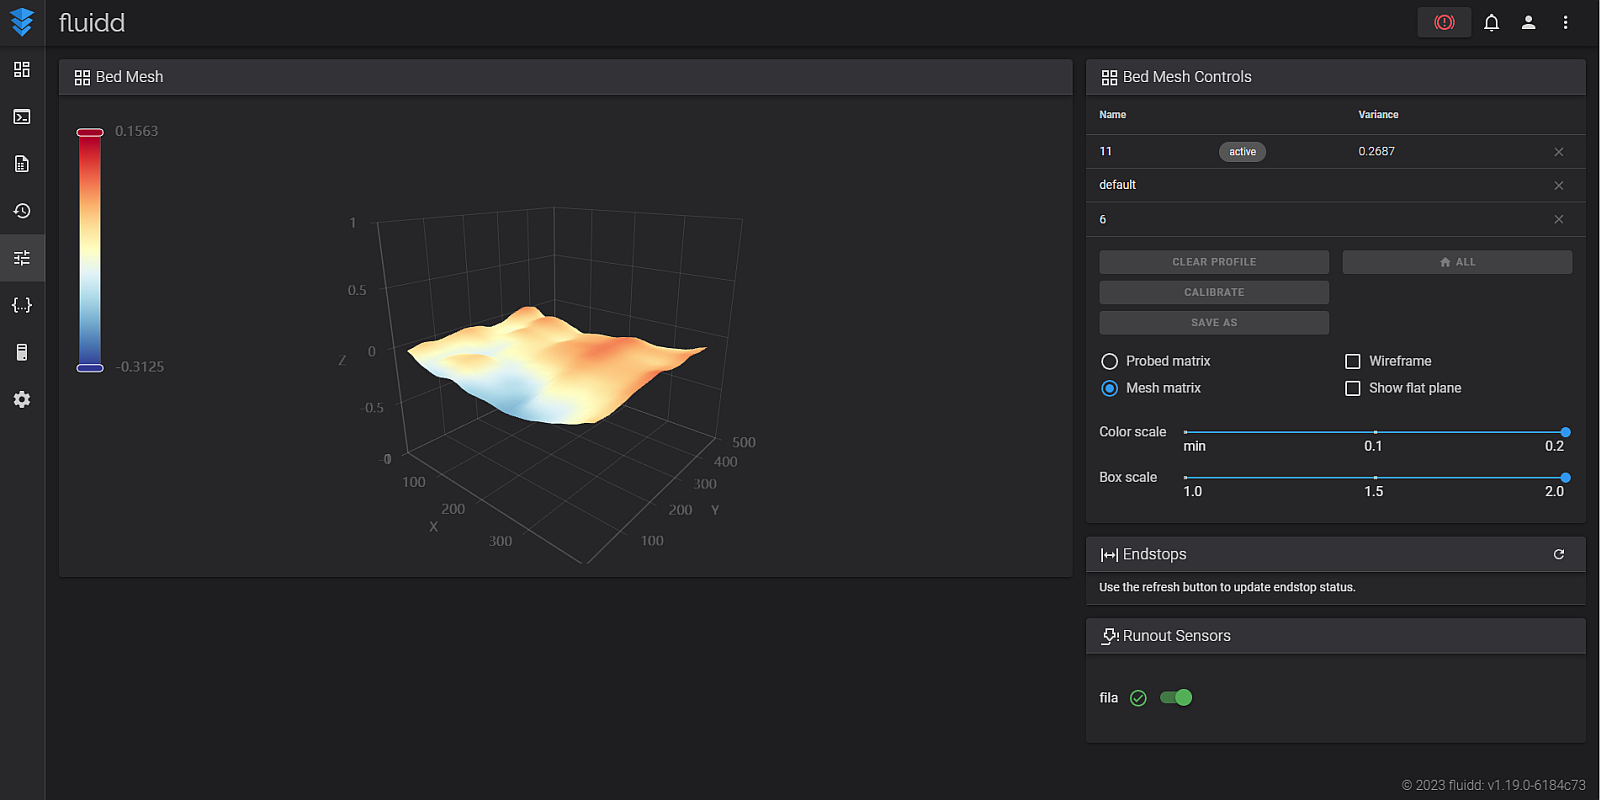
Auto level mesh display
Test prints
Once you have your printer set up and calibrated you can start printing! The Neptune 4 Max is incredibly easy to use once you have it dialed in properly. The Fluidd interface allows you to start prints right from your browser and provides data on print times and temperatures among other things. The touch screen controller is intuitive to use and responds quickly. The build surface is a magnetic PEI sheet that flexes to pop the print off easily once cooled.
To test the printer I made a few different things than span what a tabletop enthusiast might be interested in a 3D printer for. The first is board game inserts. I made inserts for Unfair and Star Wars Rebellion. The Unfair insert tested out the printers ability to print many smaller objects at once as well as uniform repeat objects. The card boxes came out great and fit into the box without any resistance from inconsistent sizing or rounded corners. The Star Wars Rebellion insert features large surface areas and a few drawers. Build plate adhesion is super important when printing large objects like this. I used a brim and had no issues with adhesion. The large pieces came out nicely and the draws fit into their slots without issue.
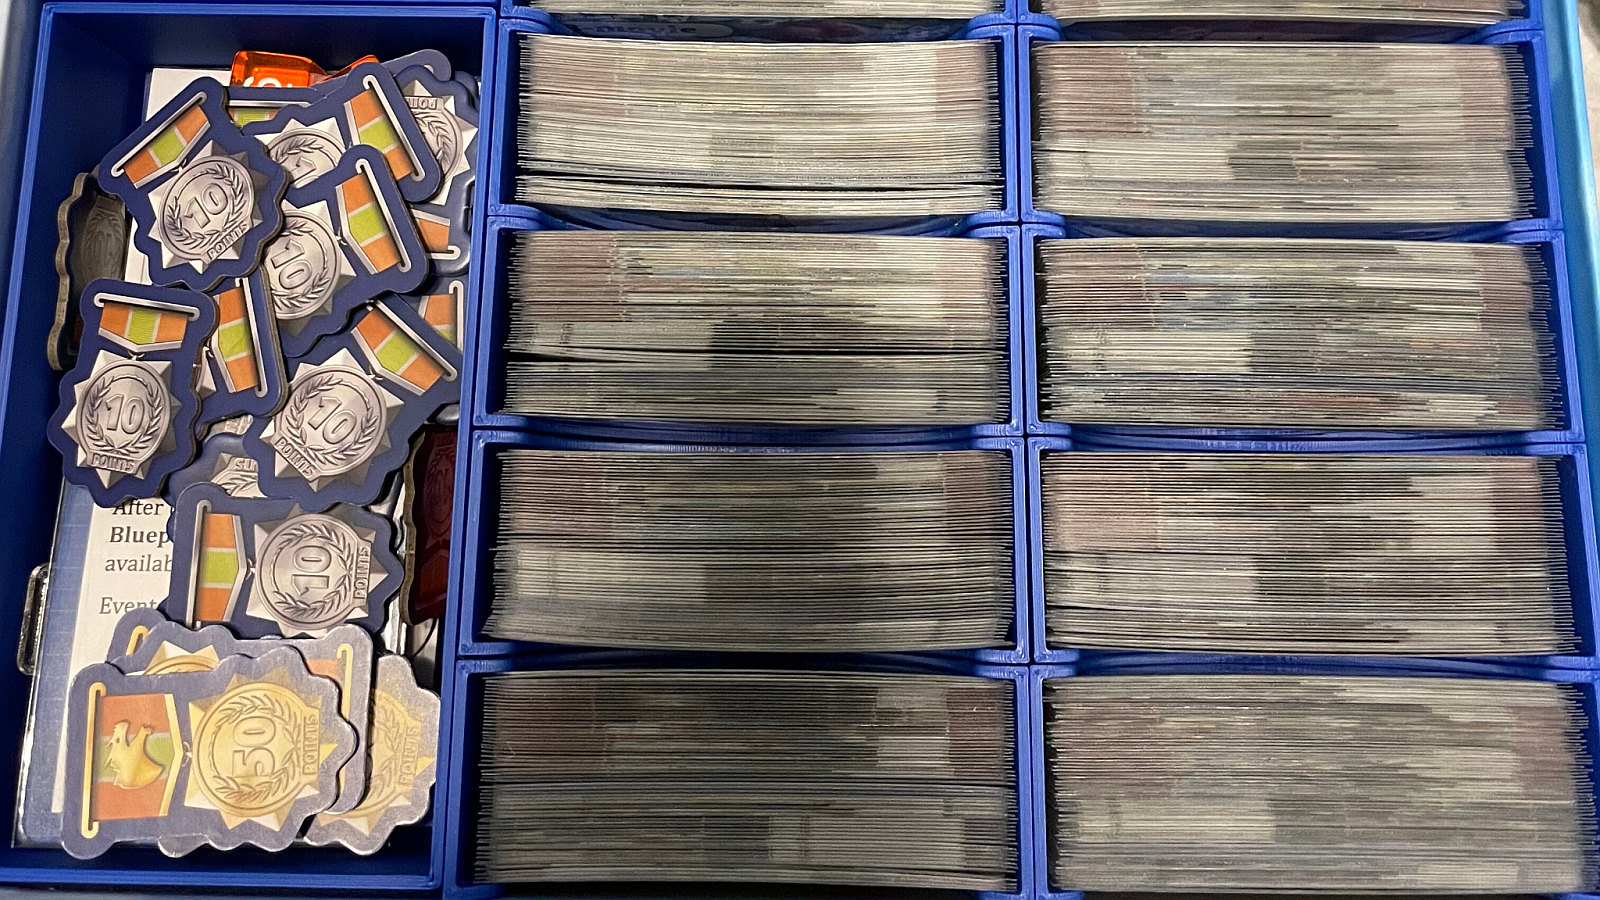
Unfair insert – Crisp corners

Rebellion insert – Prints that would be too large on a “standard” size printer
After the game inserts, I moved on to miniatures. FDM printers are not ideal for printing miniatures but you may be surprised with what you can achieve nowadays. Resin is still far superior, but for game pieces, I think FDM does a fine job. Especially if you are only going to own one printer. I found this Wyvren on MyMiniFactory by Evan Carothers (he has tons of fantastic support free models) and tossed it into my slicer at 0.08mm layer height and max speed of 100mm/s. It came out fantastic. The size of the model makes the FDM style printing a bit more forgiving but the detail that was retained was more than enough to make me happy. You wouldn’t want to print a model you are going to paint up for the Golden Demon, but for a D&D game it’s more than good enough.
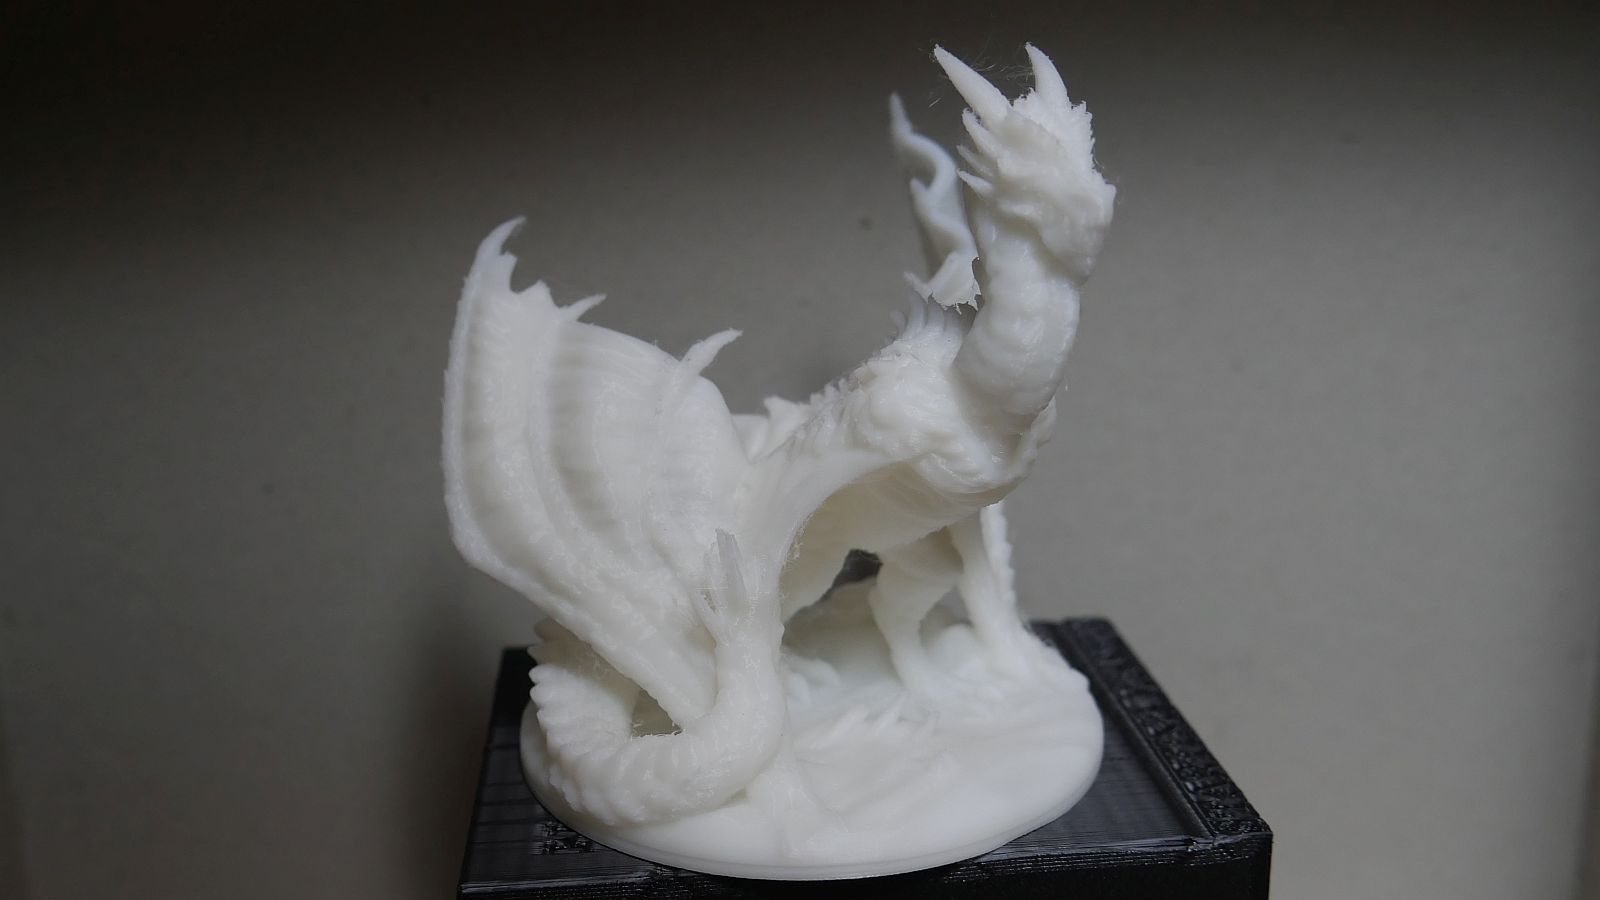
Wyvren – Detail is better in person
The reason for getting a 4 Max is the build volume so I had to test out some pretty large models as well. First up was this castle dice tray that I found on Thingiverse from MakersAnvil. I printed it on draft settings all in one piece. It came out flawless. This size model would have to be cut into quarters for a “normal” size printer. The convenience of not having to glue it together is absolutely worth the larger printer.

Castle dice tray – Print in progress
The dice tray wasn’t too detailed though so I found another large model that also has a lot of detail. I scaled this Age of Empires II Town Center model by Moffkalast up to 235% to make it big enough for 28mm minis to stand under. This model has a lot of small surface area pillars and overhangs that need to be fully supported. With larger prints like this, layer shifts are a real concern as the weight of the model increases and gets slung around at high speed. I printed this at a still fast but more reasonable 150 mm/s and it came out amazing besides an unfortunate layer shift on the roof. One of the inner corners on the roof curled up and the nozzle caught it and caused the Y-axis belt to slip. Printing slower or with some additional Z-hop on travel would eliminate this. I wouldn’t attribute it to any fault of the printer, but more so to having to dial in settings better, especially for very long prints like this one. The extremely loud (more on this later) cooling fans made easy work of the bridged sections and I didn’t have any issues with the small pillars or supports separating.
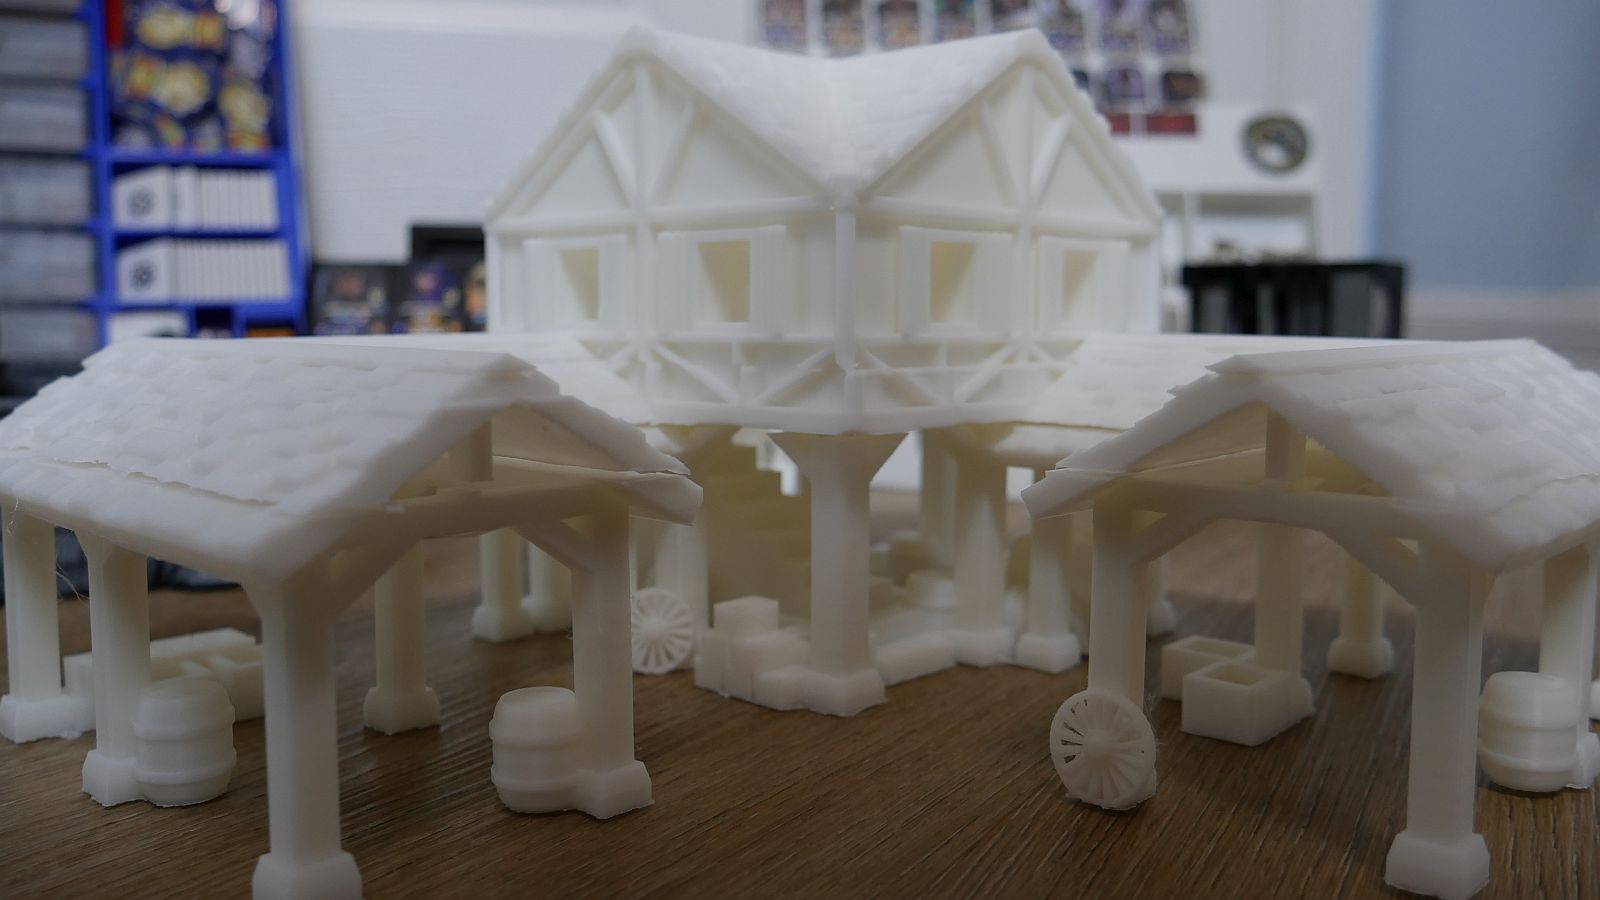
Large terrain piece

Tree supports
Technical difficulties
I did have a few issues during these tests. The first is a weird rough line across one side of the print for the Rebellion insert. To be honest, I’m not sure what caused this, though I suspect it was the same underlying cause as my other issue, which was bed leveling. Out of the box, the Neptune 4 Max did not actually use the auto bed leveling. You could run the auto level as many times as you want to and save the mesh, but the printer didn’t actually read the mesh or make any adjustments for it. This is easy to fix by adding the necessary code to your printer’s start G-code, but I would expect this to be built into the printer’s config file when it ships. There is no reason the user should have to do this themselves when the printer comes with an ABL sensor. Future firmware updates may correct this but as of writing, I had to manually modify my start code in my slicer.
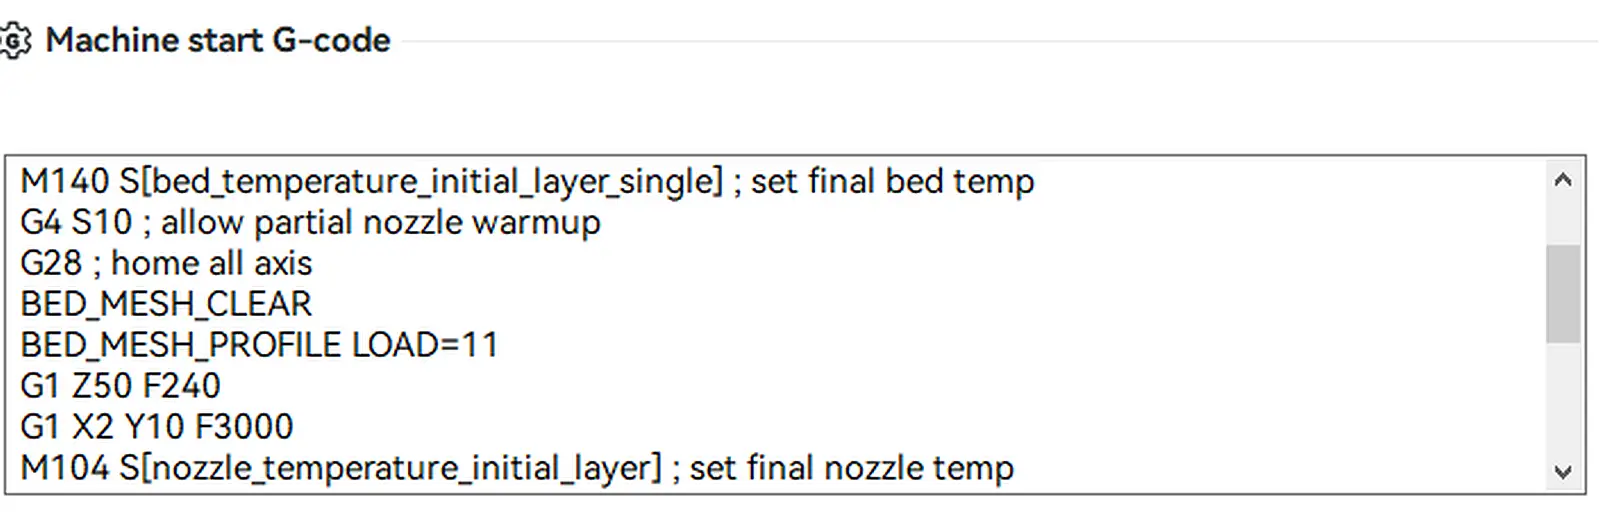
Modified start G-code to load bed mesh
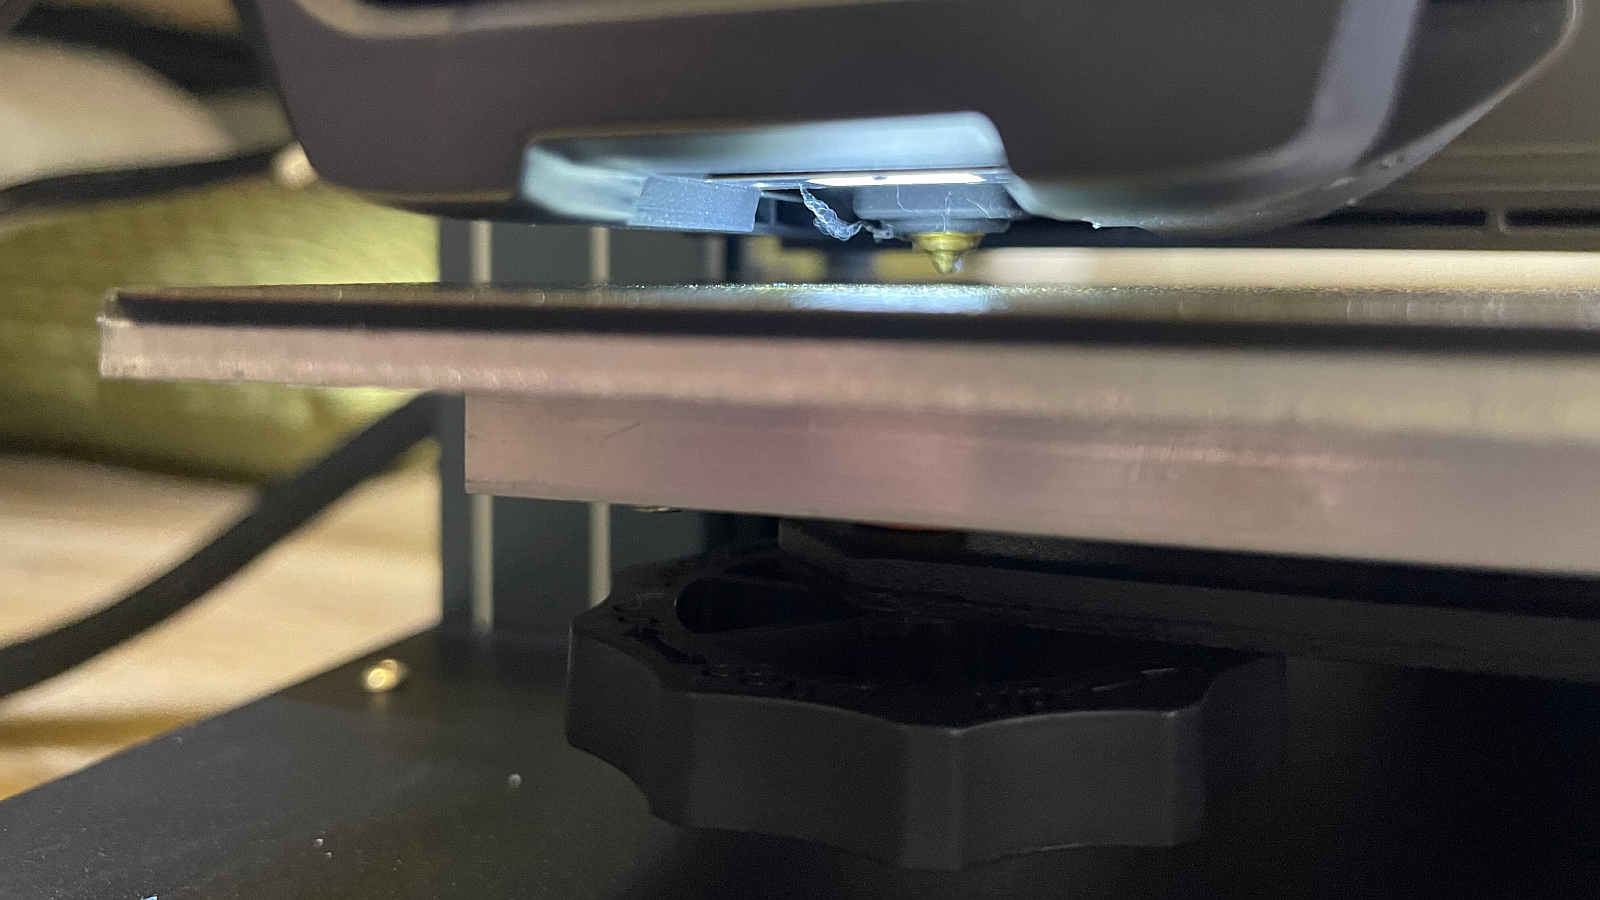
The printer also seems to have issues with the Z offset. I have had to watch the first layer go down and manually adjust my Z offset on pretty much every print. Whether this is another firmware issue or just a consequence of heating up such a large metal surface and it subtly warping differently each time, I’m not sure. For best results, I would recommend having your printer run a leveling sequence before each print to compensate for any difference the bed heating may be causing. Successful prints are well worth the extra 5 minutes it takes for the auto level to run.
Besides those few issues, there are some other inconveniences or drawbacks to the Neptune 4 Max. Most notably, this thing is LOUD. I can’t knock Elegoo for this, as it’s just a consequence of printing at these speeds, but be forewarned, you aren’t putting this thing in your bedroom. Even with “silent” stepper motors, movement at 100-300 mm/s is noisy. When you are printing that fast, you also need a lot of cooling so the cooling fans are also subsequently loud as well. Much to my wife’s displeasure, you can hear this thing going easily through walls.
Fast travel and printing speeds also causes the printer to shake, pretty violently at times. The advertised 500mm/s isn’t going to give you very good print performance but it would also likely throw your build plate or model across the room. Even at a more reasonable 100-200mm/s a very sturdy table is a must if you want to put it up somewhere. I have to have my printer sitting on the floor. I simply do not have any table or shelf that is large enough to hold the printer and strong enough to not also shake violently with the printer. This shaking, even if the printer is somewhere secure, can also be detrimental to the top mounted roll of filament. The roll can throw loops of filament from the shaking and cause a huge tangled mess. If at all possible, you should detach the filament from the printer and mount it externally.
I mentioned the lack of automatic tramming (leveling the bed with the leveling wheels) earlier. You can run this manually from the Klipper interface but there is no reason Elegoo couldn’t add this to the controller as a built-in feature. Hopefully future firmware versions will address this.
Elegoo isn’t as open as other manufactures when it comes to replacement parts. The hot-end on the 4 Max features a brand new nozzle designed just for this printer. It’s longer than most nozzles which gives you more area to melt the filament, especially important at high speeds, but this also means the nozzles are a bit harder to get compared to other more standard size offerings. The heater is a ceramic cartridge style that is incredibly fast but also somewhat new. I broke mine when removing the nozzle for the first time (user error). Elegoo sent me a replacement but I found that they are the same style heaters at the Bambu printers so there are other replacement options. For any replacement parts, the Elegoo support team is usually very responsive and will work with you to get parts but it’s not going to be as fast as Amazon for other mass produced printers on the market.

New nozzle and cartridge style heater
Finally, the magnetic bed doesn’t have any notches to line it back up when you are putting it back on the magnet. This is a very minor gripe, but other brands include alignment notches so lack of them here is noticeable.
Also, make sure you have somewhere to put this thing. I think I have made it pretty clear that this thing is huge but you can’t just go by the size of the build plate. Because this is a cartesian style printer, meaning the bed moves in the y-axis, you need to account for that forward and backward movement as well. If you are using the full build volume, you need roughly 840mm of space for the bed to move around. Like I said, mine is on the floor, which is not ideal.
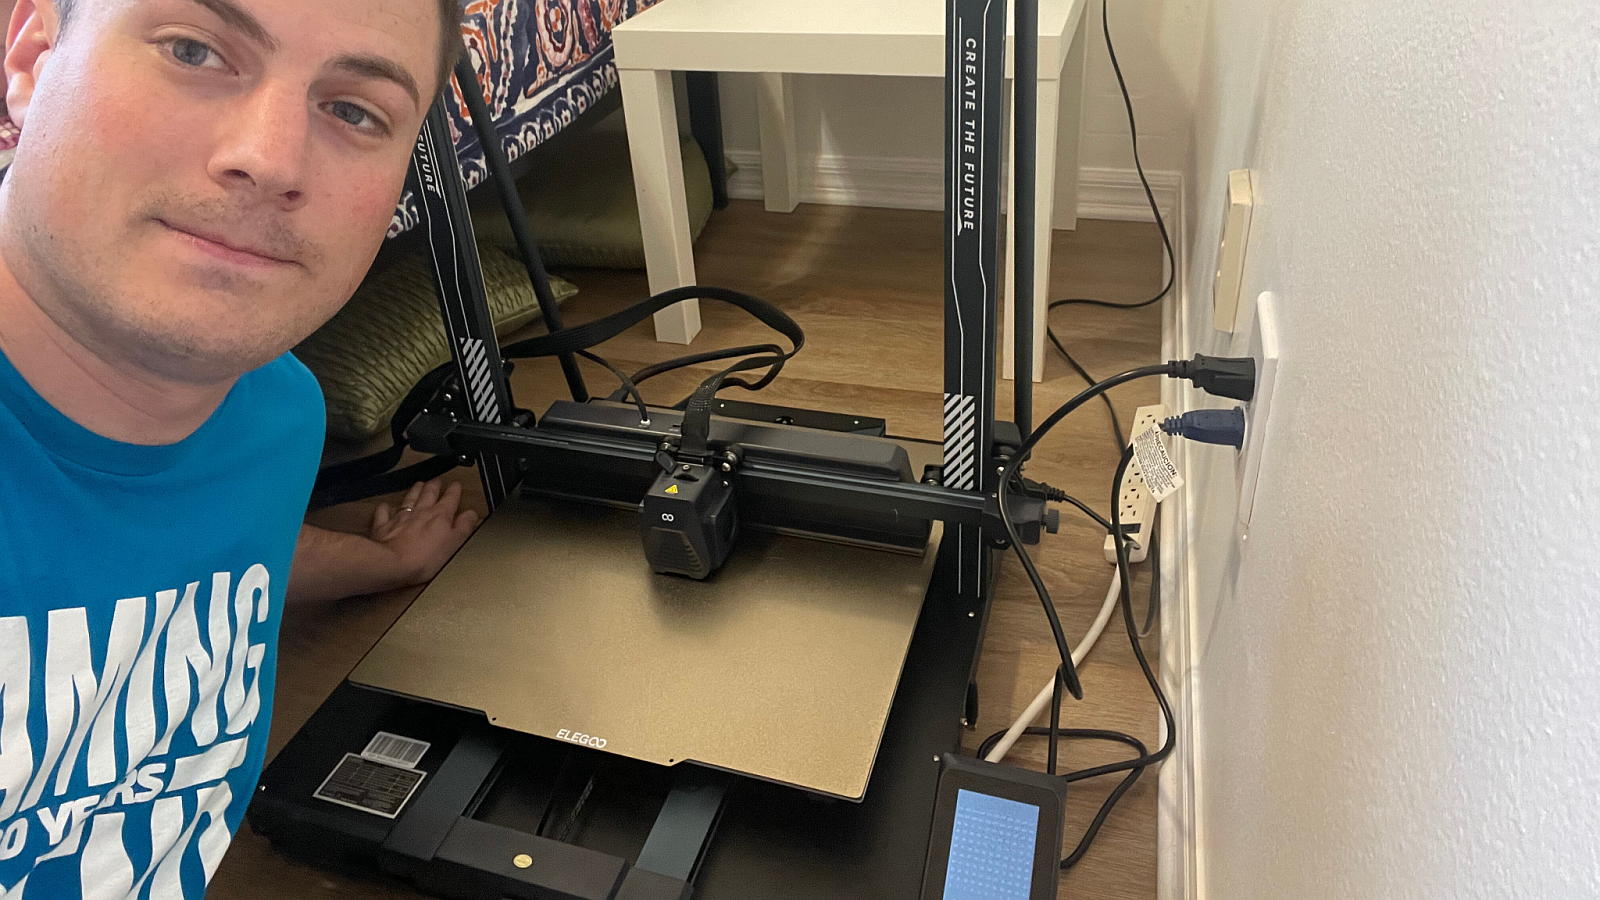
The 4 Max is so large I had to put it on the floor
Recommendation
After all that, would I recommend this printer? Well that depends on you really. The Neptune 4 Max is what is considered a budget printer. Whether that holds true to you based on your budget or not, that is the class of printer the 4 Max is in. When compared to other printers in this range, the Neptune 4 Max is an incredible value. The move to Klipper opens up tons of features for the enthusiast that wants to dig deeper, but if you just want to press print and let it go out of the box, the faster speeds are a great benefit on their own.
The industry is clearly shifting towards Core XY printers. Core XY printers move the print head in the X and Y axis while the print bead is stationary at each layer and moves down as the project prints. They are much more stable than bed-slingers which allows them to utilize the faster Klipper enabled speeds and with better quality prints. They also take up less space since the bed doesn’t have to move around. The main drawback right now is that they are also significantly more expensive. Because of that, the Neptune 4 Max may appeal to the more budget minded person but in my opinion, it won’t be long before this style of printer is obsolete.
There is room for Elegoo to improve the firmware and include some handy Klipper features like the tramming tool I mentioned. I’d also expect the Z offset to be less of an issue on a new printer. It is manageable, but shouldn’t be a problem like it is. Getting a nice first layer should be easy after properly setting the Z offset once, but the 4 Max appears to lose the value or have some other bug interfering with it. Fortunately the offset can be adjusted on the fly from the touch screen or Fluidd, but the point is that you shouldn’t have to. Like any 3D printer, I would caution those with no mechanical experience or knowledge of how 3D printing works. This isn’t the hardest printer to learn on, but there are challenges that will require time to learn and overcome. The large build plate isn’t going to do a new user any favors either. Potential issues are only amplified and new issues can pop up when you are dealing with the added problem of heating and traveling over such a large surface.
If that doesn’t scare you and you are prepared to put in the effort to learn a new hobby if you’re not an enthusiast already, then it’s hard to beat the Neptune 4 Max in terms of size and value. The offset issue is the only thing holding the Neptune 4 Max from a higher score. I would expect Elegoo to correct that over time, but I have to review what I have right now. The Neptune 4 Max brings the Elegoo line of FDM printers inline with features that are becoming industry standard. The large build volume and sleek professional looking styling of the Neptune line set it apart from the competition. If you just want to press print without having to do any of the calibration work or fiddling with leveling wheels or gaining 3D printing as a hobby in itself, then I would recommend looking at other options until Elegoo steps into that realm of printer as well. It’s going to cost you though.

A life long video gamer, Mark caught the Tabletop itch in college and has been hooked ever since. Epic two player strategy games are his favorites but he enjoys pretty much everything on the tabletop, just no Werewolf please. When he gets a break from changing diapers and reading bedtime stories he can usually be found researching new games or day dreaming about maybe one day having time for a ttrpg. Some of Mark's favorite games are Star Wars: Rebellion, A Feast for Odin, and Nemesis.

The Elegoo Neptune 4 Max is a steal at $470. The massive build volume and Klipper enabled print speeds will allow you to crank out terrain and models for your D&D games or organizers and upgrades for your board games. The few drawbacks that exist are easy to overcome for those willing to learn and invest time into the 3D printing hobby.
PROS
- Massive 420x420x480mm build volume
- Fast 100-300 mm/s print speeds
- Nice spread of common upgrades and accessories preinstalled
CONS
- LOUD. It's so loud
- Advanced bed leveling features not built into controller
- Some firmware issues at time of review
Unless otherwise stated, the product in this article was provided for review purposes.
See below for our list of partners and affiliates: