Play Games
 3 months ago
123
3 months ago
123
3D printing is rapidly changing and innovating. A year ago, the industry was shaken up by the arrival of the Bambu Labs printers. The K1 is Creality’s answer, bringing them inline with the top of the hobby level printer market.
Here on the Tabletop side of GamingTrend we are interested in gear and technology that can enhance the tabletop gaming experience. 3D printing has huge potential across almost all aspects of the tabletop space. This review will be grounded in that context. How easy is the printer to use for someone that wants to enhance their tabletop games without necessarily wanting to add printing as a hobby of its own? Does the printer require experience to set up and use or can a novice get it up and running? Is it suitable for printing things like game inserts, terrain, or miniatures? These are the things I looked at for this review. I will not be covering things like the ability to print production quality parts, exotic materials, or tuning for peak performance.
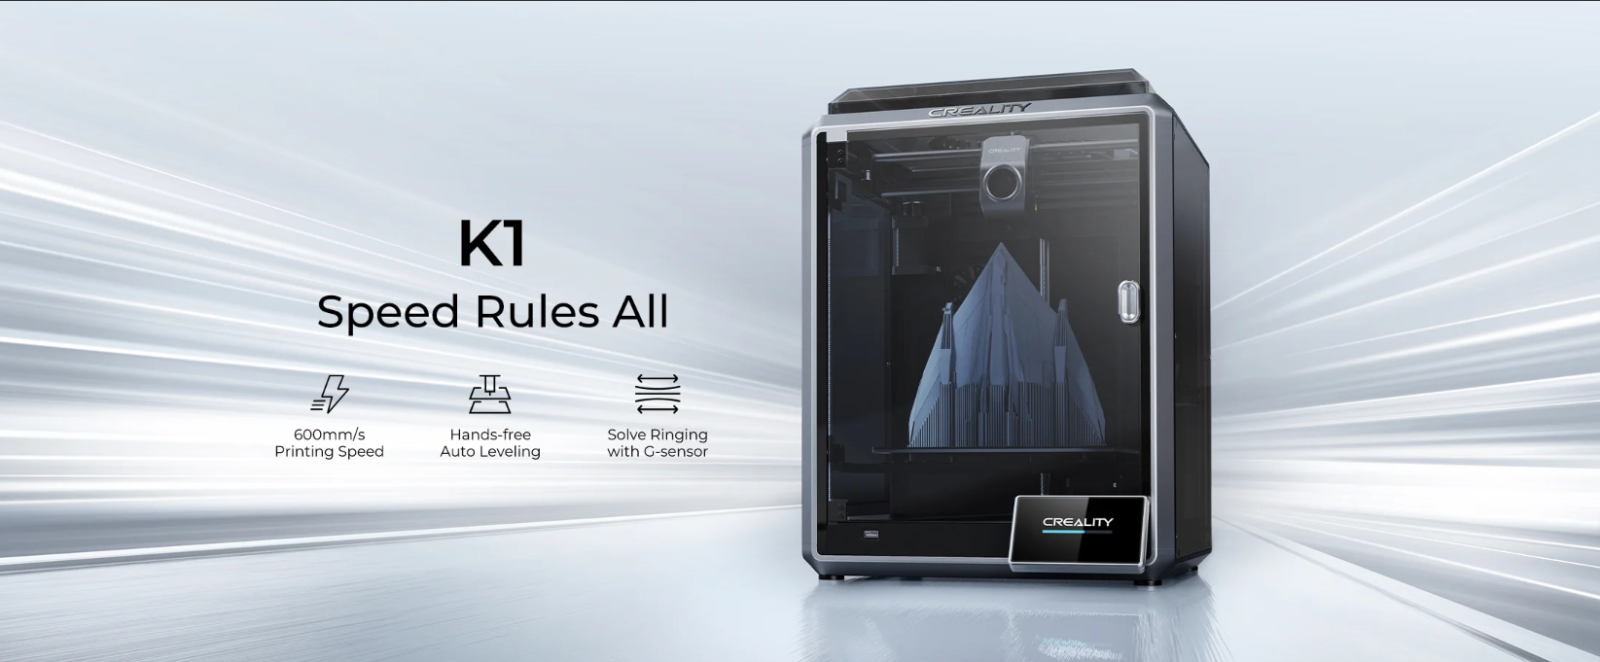
Behold, the K1
Capabilities
If you are familiar with Creality printers like the workhorse Ender 3, then the K1 is a huge leap forward. The two main differences being that the K1 is Core XY printer and that it runs on Klipper. Core XY means that the print head moves in the X and Y directions by a combination of two diagonal motors and that the print surface descends as the part is printed. There are several benefits to this style of printer over the cartesian, or bed slinger, style printers. The diagonal movement provides smoother and more accurate positioning and faster movement as well. Since the bed isn’t moving back and forth, you also have less mass shifting around which also enables higher speeds. There are however a few disadvantages. Core XY printers are much more complicated in their construction and configuration so repairing things like snapped belts or even just changing nozzles is more complicated than a bed slinger. The other disadvantage just comes down to price and that may or may not be a concern for you.
The K1 has the same build volume as the Ender 3 at 220x220x250mm but is contained within a rigid chamber. The chamber enables you to print higher temp materials much more easily than with an open air printer. Visually, the K1 looks like a proper appliance compared to older printers that more resemble engineering projects. Creality advertises that the K1 is ready to print right out of the box, and I can confirm that is true. I’ve never had an easier time printing than with the K1. After just a few set up steps, you press the self check button, wait for the calibration to finish and you’re ready to go. It’s incredibly easy.
The main attraction of Klipper for most users is the faster speed. We all want to print faster so we can print more. That table sized town you want to print for your D&D game isn’t going to print itself. The K1 has an advertised speed of up to 600mm/s. It boasts an incredible 20,000 mm/s^2 acceleration so it’s actually possible to reach those max speeds on long straight sections. Realistically though, you will be printing in the range of 100-300mm/s depending on material, model size, and complexity. It’s hard to understand how fast that is without seeing it for yourself. If you have experience with older printers, then this is really going to blow your mind.
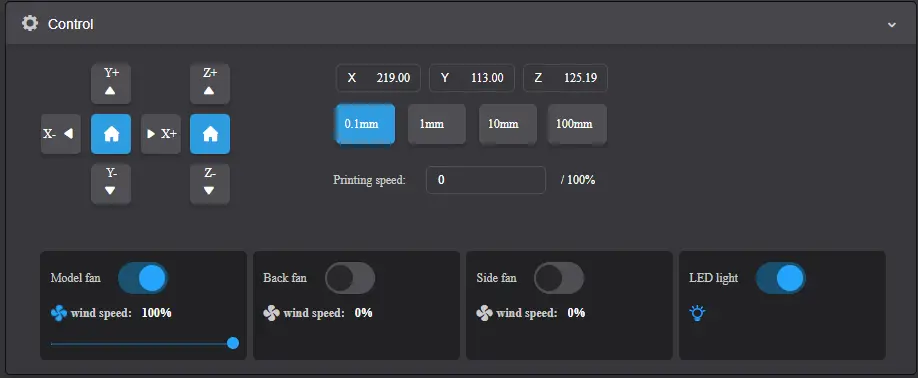
Creality Print control interface
Besides speed, Klipper gives you much more control and easy access to your printer’s settings than Marlin. If you connect your printer to the internet, you can copy the printer’s IP address into your web browser and access Fluidd, or in the K1’s case, Creality Print. Creality Print is a custom build of Fluidd and is a control interface that lets you control and monitor the printer from a web browser but due to the custom build, doesn’t allow access to the underlying Klipper programming like a default build would do. From the home screen you can directly control your printer, send commands, get temperature data, and start and monitor prints in real time. This is also where you can see the bed level mesh from the auto leveling and monitor the camera feed if you have one installed. Creality Print also has a really useful feature installed that allows you to skip objects on the build plate. This is incredibly useful if you are printing a full plate of parts and one fails in some way but the rest are printing fine. You can tell the printer to skip that failed part from now on and it will do just that. I’ve already used this to save a print to great effect.
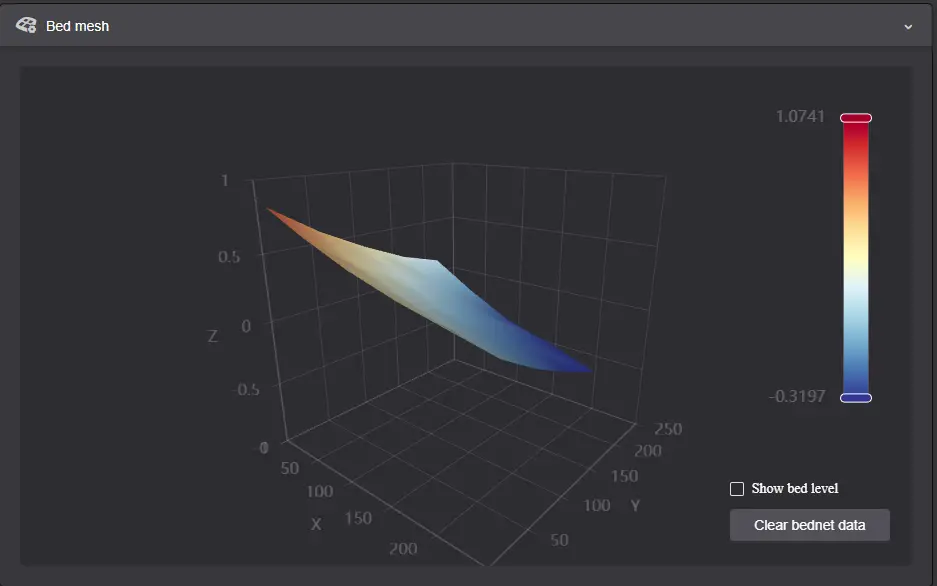
Bed mesh created by auto leveling feature
While the features of Creality Print are nice and make it less likely that a novice is going to mess up their printer config files, the lack of access to the config files is a bit of a step backwards for a Klipper enabled printer. One of the main benefits of Klipper is the ability to modify the config file quickly and easily from within Fluidd. If you want to do that on your K1, you will need to go through a process called Rooting to install a clean version of Klipper. If you decided to do that though, you’ll likely be voiding your warranty. Use your own discretion.
The K1 comes with almost every feature currently available pre-installed with only three notable absences. The K1 is camera enabled but does not come with one. You’ll have to add that on yourself if you desire. It’s a very easy install if you go with the Creality designed camera for the K1. The K1 Max and the much pricier Bambu X1C come with a lidar feature that can perform additional calibration steps and detect print failures and pause the print for you in real time. I didn’t expect this on the cheaper K1 but it’s a modern feature that could have been included, but isn’t. The final missing feature is any kind of multifilament add on. Again, I didn’t expect this, but the X1C has taken the printer community by storm with its built in ability to print in multiple colors. I doubt it will be long before Creality has a similar offering, but you won’t find it on the K1 at time of review.
Despite those few missing features, all of which are nice to have but not necessary, the K1 has plenty of great features installed that previously users always had to upgrade themselves on printers like the Ender 3 series. You will get a filament runout sensor, sensorless homing, USB capability, silent motherboard, and a touch screen controller.
- A filament runout sensor allows the printer to detect when the roll runs out and automatically pause the print and wait for you to refill it.
- Sensorless homing is more of a nice to have than a necessity. It has less moving parts and switches to worry about and works with the enhanced capabilities of Klipper by detecting feedback on the stepper motors when you hit the end stops. This relies on some coding and calibration which should be sorted out via the installed firmware.
- USB capability is another nice to have. If you are not using the WI-FI, then transferring via a USB is simply more convenient than fiddling with micro SD cards and adaptors.
- Silent stepper motor drivers used to be something you had to upgrade yourself and involved swapping out the entire motherboard. The K1 has this preinstalled, though the noise level of the cooling fans largely negates any reduction in noise from the stepper motors.
- The touch screen controller attaches to the front of the printer. The screen is quick and responsive to touch and fairly user friendly. Its positioning leaves a gap in the glass door which could be a problem when printing materials that require steady chamber temperatures but isn’t an issue for standard PLA.
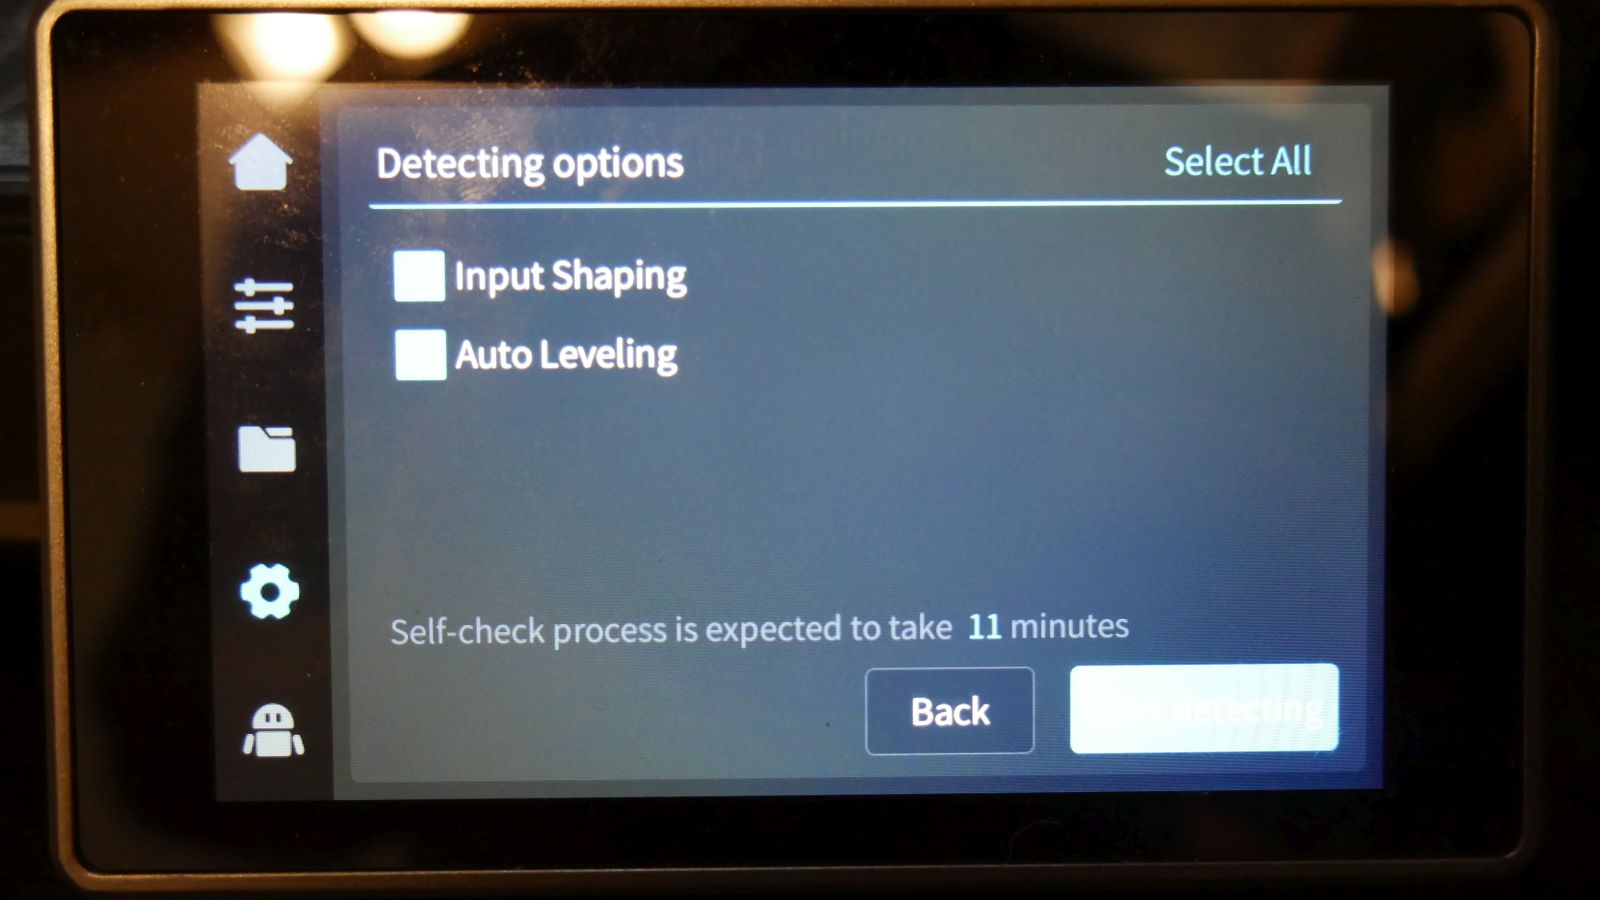
Screen with self check automatic calibrations
If you decide to get a K1, setting it up is quick and easy. It comes securely packed in dense foam, though I have seen some evidence of broken glass from various forum groups. If that happens to you, be sure to take pictures and contact Creality customer service right away. Once you unpack the printer, the instruction book has just a few very clear instructions to follow to get you started. The most important being that you remove the bolts securing the print bed before you try to run the calibration.
Speaking of calibrating, this is again, incredibly easy. The printer has a “self check” button that will run an input shaping calibration to compensate for vibration and then an auto leveling process. After that you are ready to print. This focus on making it easy to use makes the K1 a fantastic choice for those looking to enter the hobby with minimal effort. The downside, going back to the custom Creality Print build of Klipper, is that you cannot easily adjust any other parameters that you would normally be able to calibrate on a Klipper enabled printer.
The auto bed leveling works really well. It seems to be a theme with this printer that there are great features that also have downsides. By again focusing on making this printer as user friendly as possible, Creality has eliminated the traditional manual bed leveling knobs. All you have is the auto level. Kind of. If your bed mesh looks pretty good, then the printer will actively compensate for any deviations during the print. You can see the bed move up and down slightly as the nozzle travels to verify it’s using the recorded bed mesh. If your results are way off, you’ll have to do a manual adjustment. Rather than the knobs that raise and lower the corners of the bed on most printers, the K1 has a somewhat tedious process of unbolting the bottom of the printer and going through steps to adjust the belt tension and position of the bed on the Z rods. I had to perform this on my review model and it wasn’t really difficult but definitely harder than turning some adjustment knobs. Depending on how comfortable you are disassembling and reassembling things you may find this more daunting.
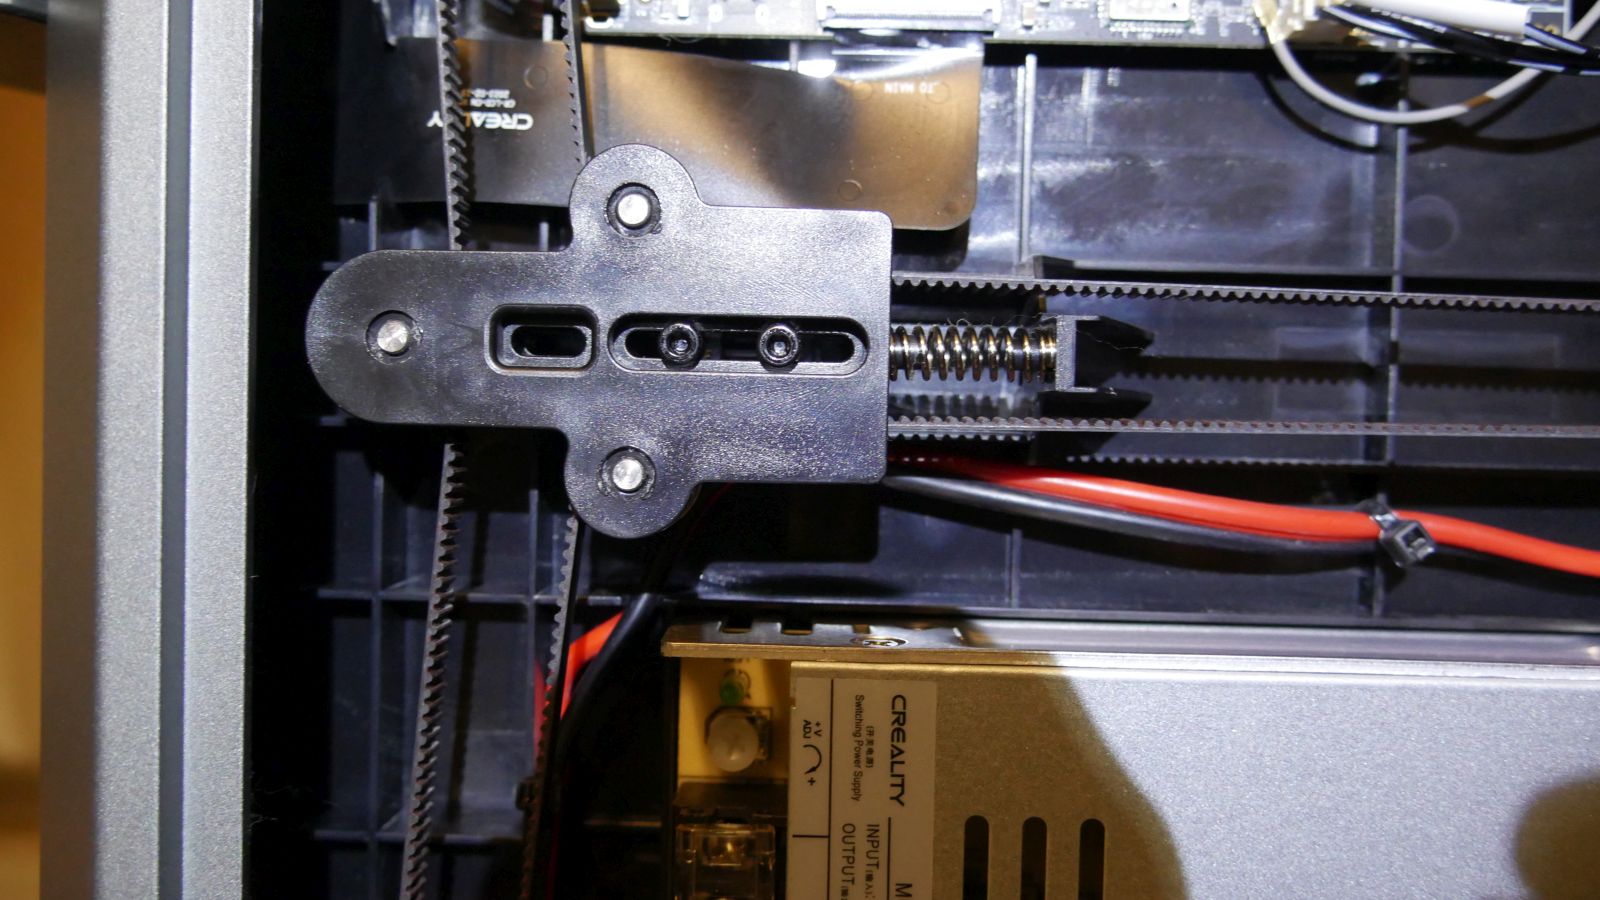
Belt tensioner underneath the printer to do manual bed adjustment
Actually printing with the K1 could not be any easier. You can send files to the printer directly from your computer and monitor them in real time if you are on the same network. I have the Creality camera installed on mine and the camera feed conveniently displays in Creality Print. In all of the testing I have done for this review, I have not experienced a single issue. Changing filament is a bit annoying with the spool mounted on the back, but that can be fixed by printing a side mount piece. You’ll want to pay attention to the instruction on changing filament as the workings of the direct drive extruder are a bit different than what you may be used to if you are coming from an older style printer.
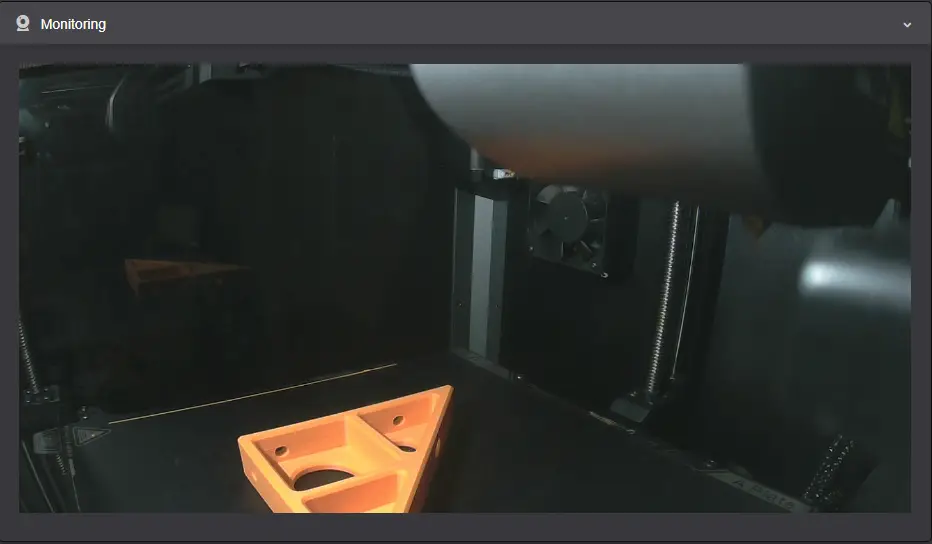
Camera feed in Creality Print
Test Prints
Since GamingTrend is all about games, I focused on game related prints to test out the K1. I printed some board game inserts, some miniatures, some terrain, as well as a few non game related toys and figures for the holidays.
The first game insert that I printed was for Summoner Wars 2nd Edition. It was badly in need of a way to organize all of the decks that I have. None of the pieces for this insert are especially large but it provided a couple of good tests. The deck dividers are pretty thin and flat but I didn’t have any issues with curling or warping. The middle dividers are actually two pieces that lock together and the pieces fit together with no issue. This print was a resounding success and in my opinion looks great in this translucent red filament.
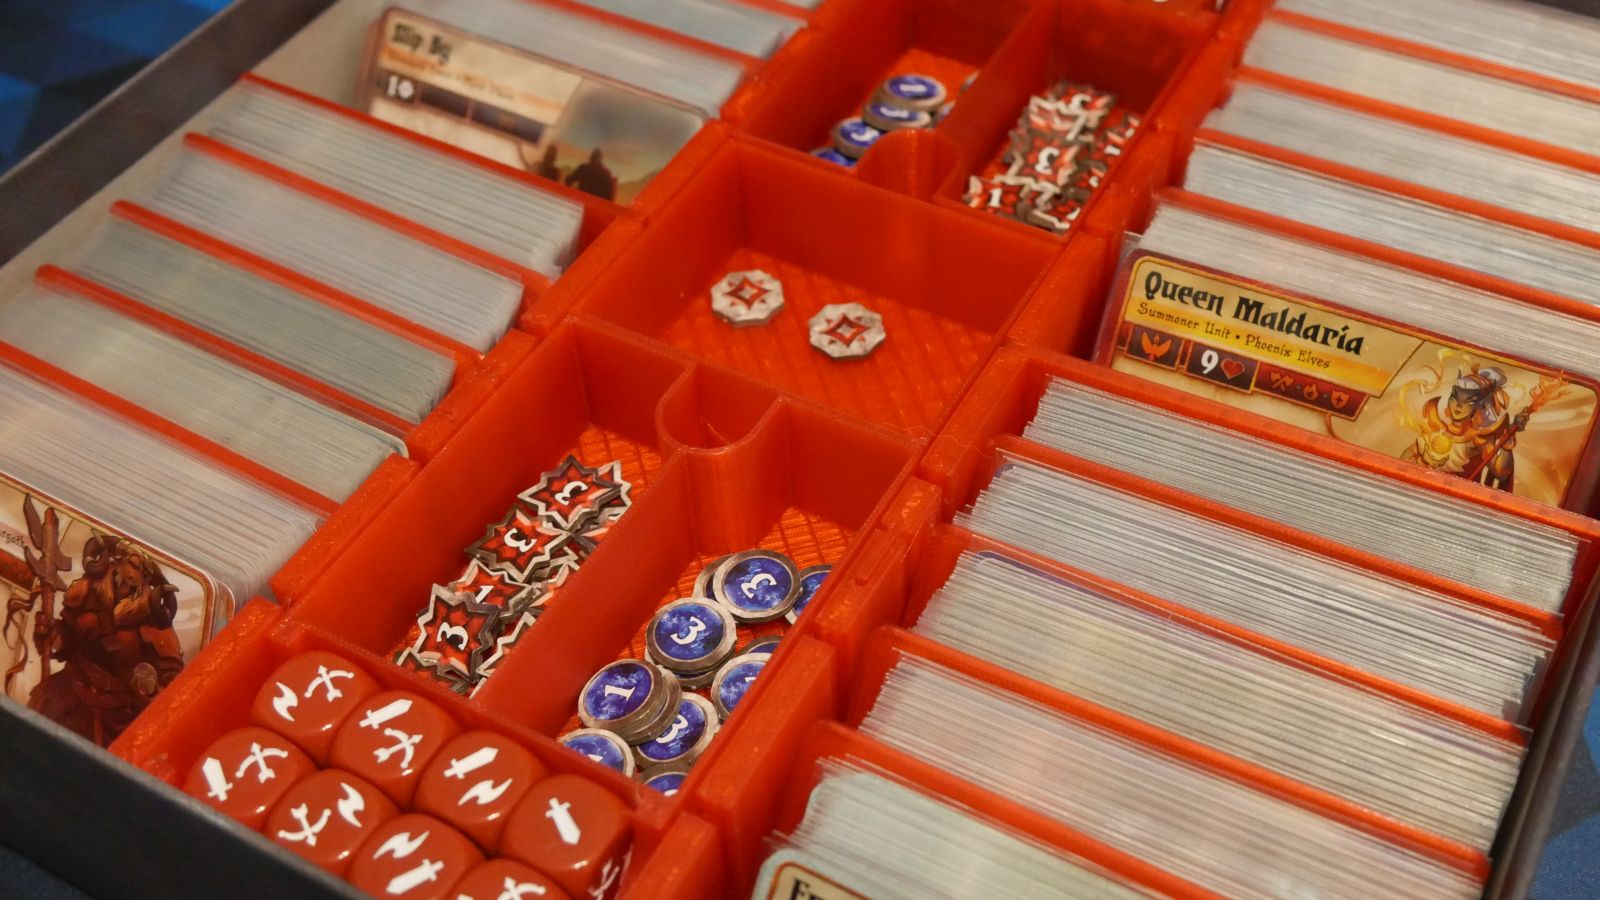
Insert for Summoner Wars – lots of slim flat surfaces and interlocking pieces
Next I started on a Root organizer as well as a set of deluxe tokens. I have not printed everything for this project yet, as it is extensive, but I got a fair bit done. The faction boxes have sliding lids that move smoothly and the detail on the building pieces came out great. Keep an eye out for a separate article specifically on this project once I finish it if you want to see more.
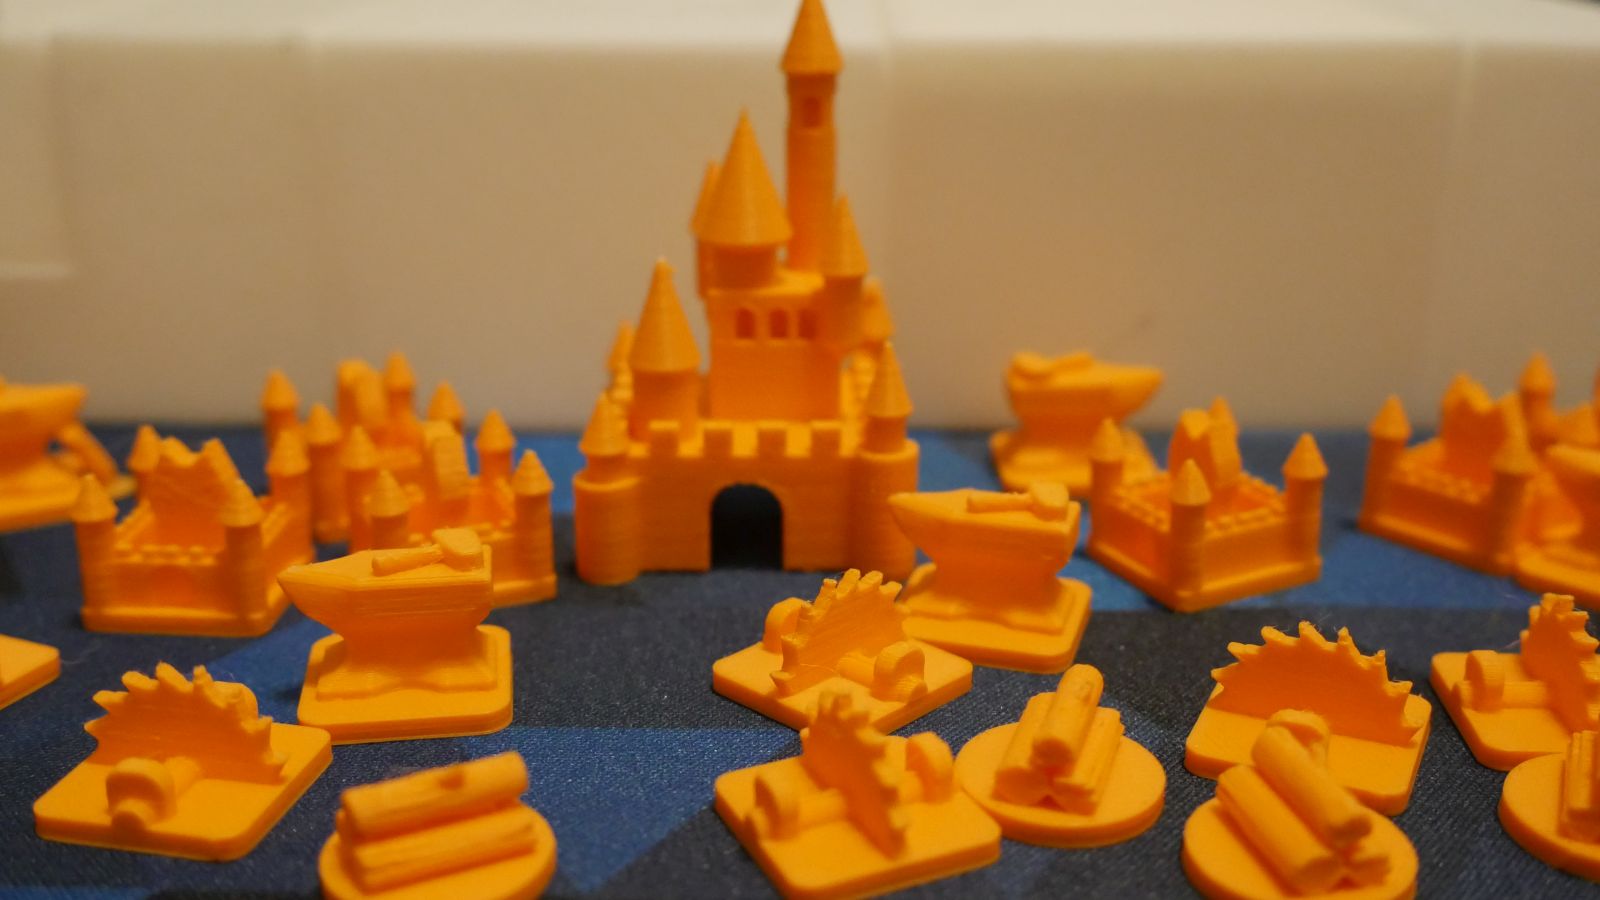
Root bits
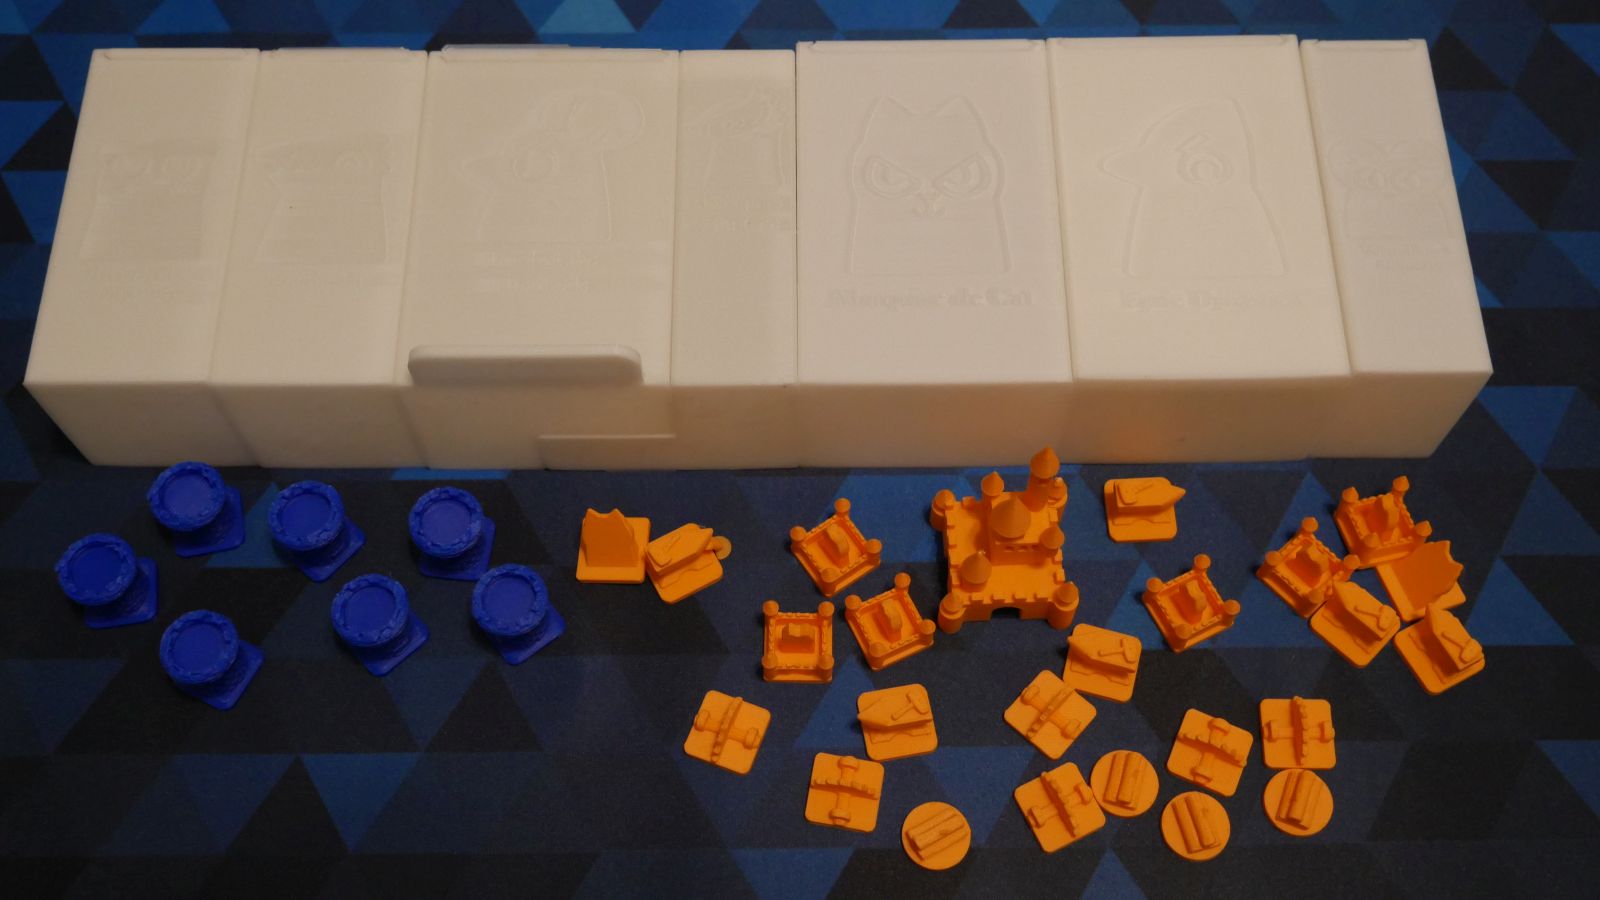
More Root bits
I printed some D&D scale miniatures to see how much fine detail I could get out of the K1. FDM printing isn’t ideal for miniatures but it can produce serviceable results if you’re not too picky. The Wyvern came out really nice and is a bit more forgiving since it is a larger model. The Orc Warrior and Wizard lost a lot of detail being so small but you can still easily see what they are so I call that a win. These were all printed with default settings so I would expect you can squeeze a bit more performance out if you really dial in your slicer settings or go with a smaller nozzle.
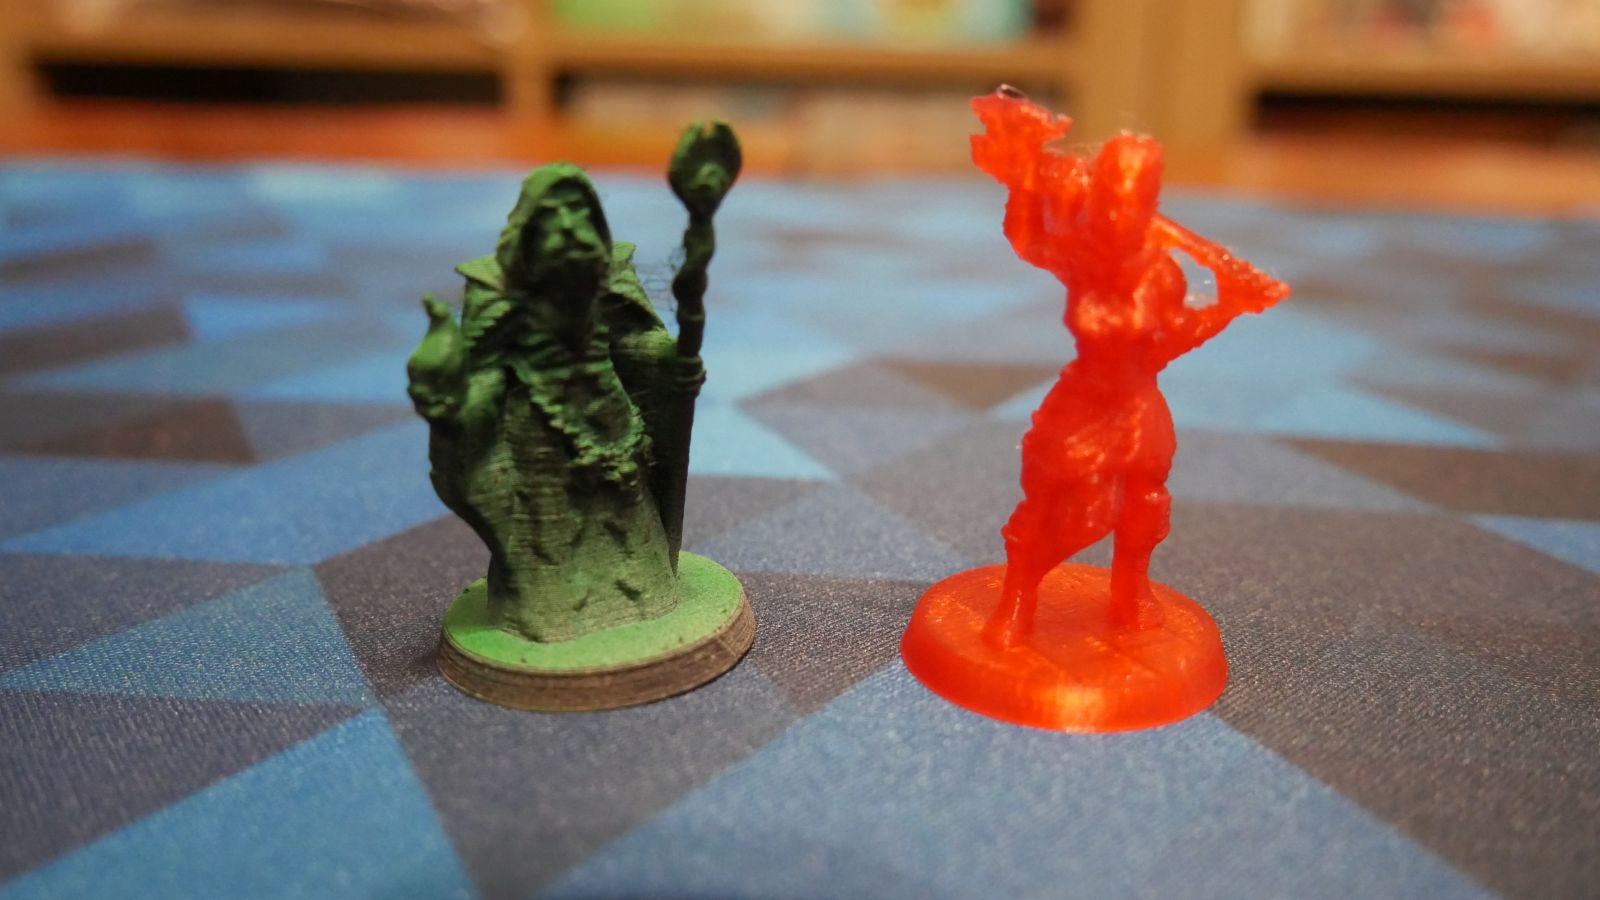
28mm scale minis
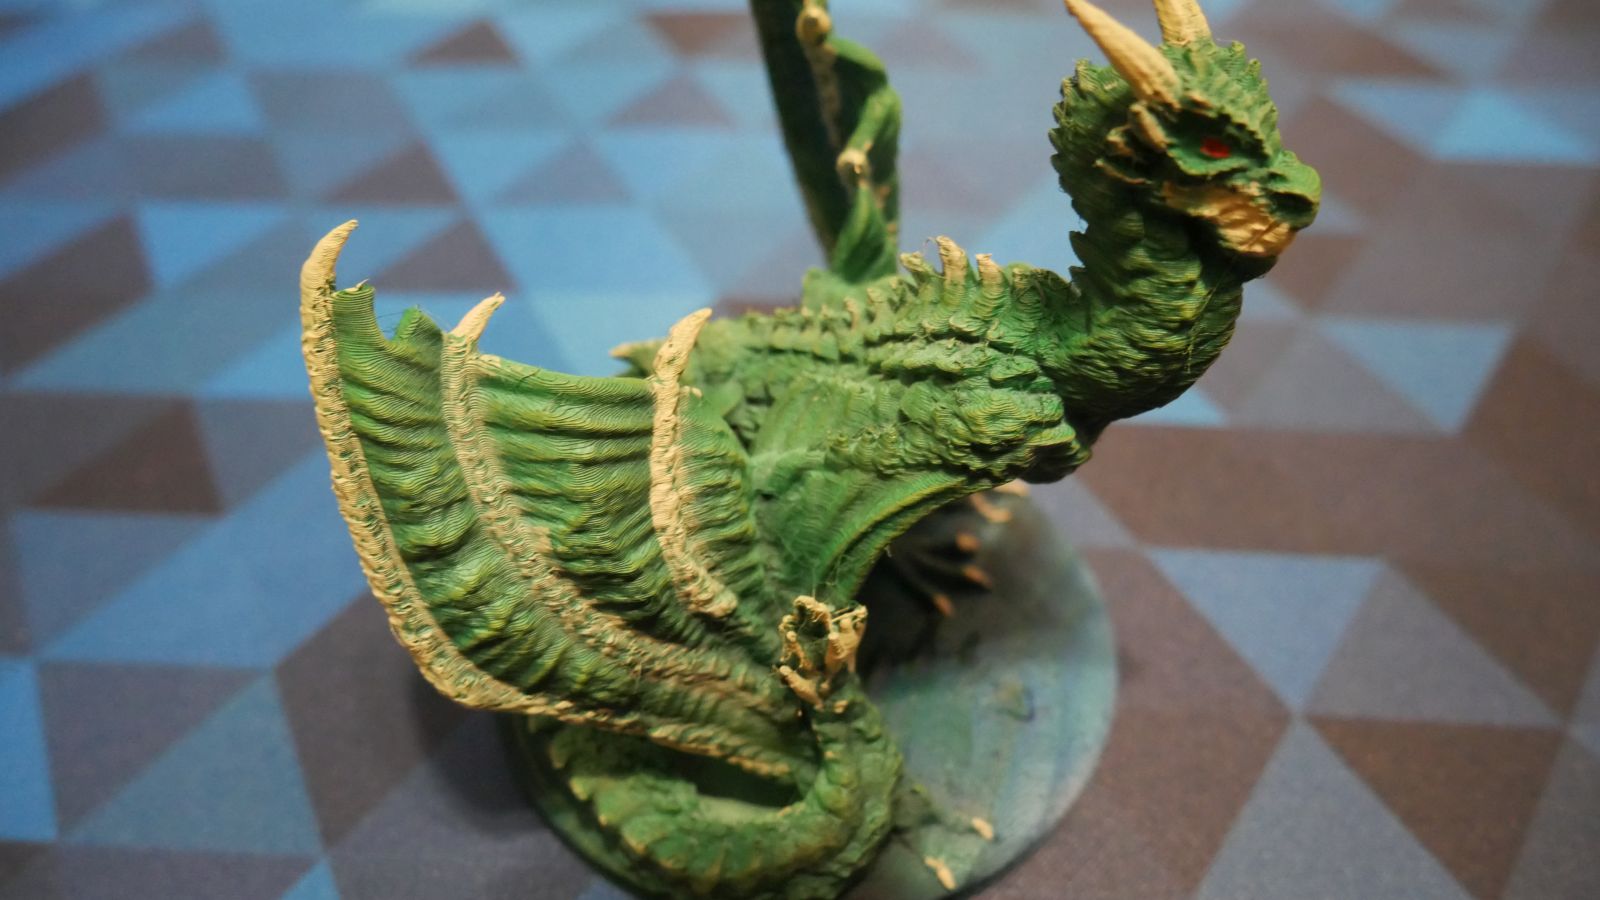
28mm scale Wyvern, this is not a review of my painting skills
This small cottage is a great example of the type of terrain pieces that FDM printers excel at producing. The cottage has plenty of detail and printed blazing fast. I had no issues whatsoever with any of the overhangs or tiny movements that the roof shingles required. You could have a whole table of terrain printed in no time at all.
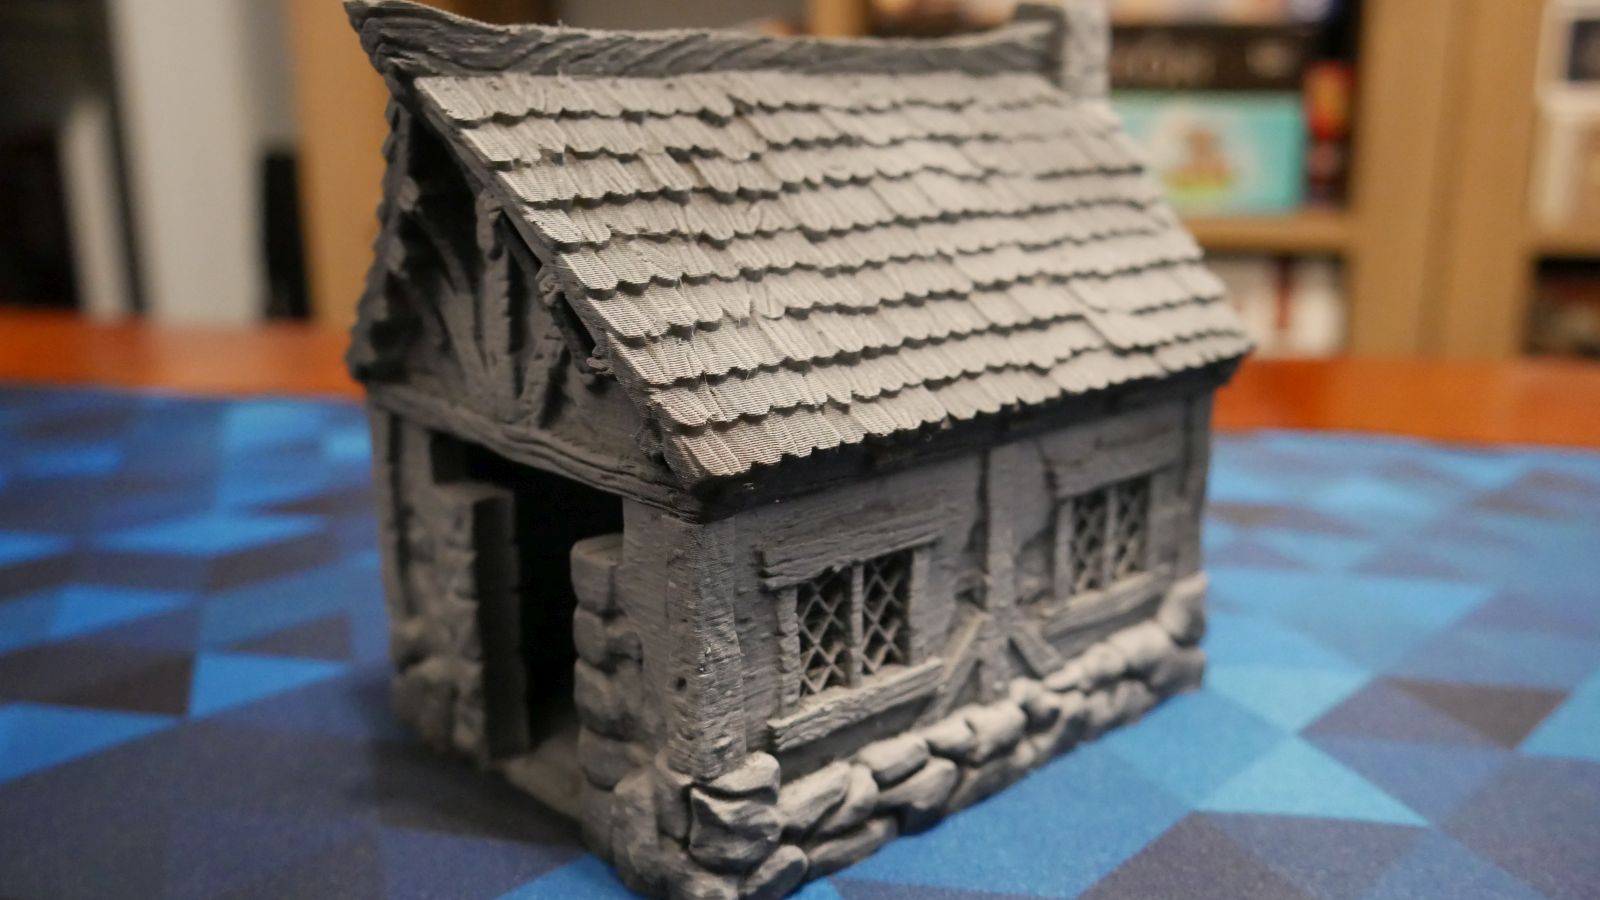
Small cabin
Finally, just for fun and Christmas gifts, I also printed a handful of FlexiFactory models and some decorations. The K1 had no issues swapping between Creality Hyper, silks, rainbow, translucent, and other third party solid color PLAs.
Final Thoughts
If you are an experienced 3D printer, then the K1 is going to be a breath of fresh air. If you are new to the hobby, it’s never been easier. Keep in mind when something does eventually go wrong, the K1 is going to be a bit harder to work on than a simpler machine. Fortunately there are already tons of great resources online to help you out. The K1 has really impressed me with its ease of use and performance right out of the box. I think you will be hard pressed to find more than one other competitor at this price point that can perform to what the K1 can do. My only complaints are the rear mounted filament holder and the noise. With a few printed files, you can fix the first one. The second is just an unavoidable consequence of printing this fast. Worth it in my opinion, just don’t put this thing in your bedroom.

Side mounted spool holder mod

A life long video gamer, Mark caught the Tabletop itch in college and has been hooked ever since. Epic two player strategy games are his favorites but he enjoys pretty much everything on the tabletop, just no Werewolf please. When he gets a break from changing diapers and reading bedtime stories he can usually be found researching new games or day dreaming about maybe one day having time for a ttrpg. Some of Mark's favorite games are Star Wars: Rebellion, A Feast for Odin, and Nemesis.

I have no reservations recommending the Creality K1. The speed is amazing. The quality of prints is outstanding, and the focus on ease of use opens the 3D printing world up to so many more people. I can’t wait to see what people create.
PROS
- Blazing fast
- User friendly
- Looks professional
CONS
- Fans are quite loud
- Rear mounted spool holder
- Needs to be rooted to get the most out of Klipper
Unless otherwise stated, the product in this article was provided for review purposes.
See below for our list of partners and affiliates: