Play Games
 4 weeks ago
43
4 weeks ago
43
Starting my 3D printing adventure with the Creality Ender 3 V3 SE has been an eye-opening journey from beginner to slightly-more-than-beginner. This user-friendly printer, packed with complex features, taught me the ropes of 3D printing. It’s versatile, handling everything from detailed game pieces to practical household items. The Ender 3 V3 SE is not just a tool but a gateway to the expansive world of 3D printing, offering a balance that appeals to both beginners and seasoned users.

3D printed insert for Agricola: All Creatures Big and Small. Yellow filament may not have been the best choice with yellow components.
First-Timer’s Friend: Ender’s Easy Entry
Before delving into the nuances of its operation and the broader landscape of 3D printing technologies, it’s essential to understand these foundational aspects of the Ender 3 V3 SE. Its bed-slinger mechanics and Fused Deposition Modeling (FDM) methodology pave the way for an educational and engaging printing experience, making it an ideal starting point for those new to the field.
A ‘bed-slinger’ printer, like the Ender 3 V3 SE, moves the print bed along the Y-axis (back and forth) while the print head moves along the X and Z axes. This design is straightforward and cost-effective, making it a popular choice for consumer-grade 3D printers. However, the movement of the bed can introduce vibrations and inertia, especially with larger prints, potentially affecting print quality.
In contrast, CoreXY machines feature a stationary print bed, with the print head moving in all three dimensions (X, Y, and Z). This design reduces the movement-induced vibrations and allows for faster printing speeds and higher precision. CoreXY printers are often more complex and expensive, making them less common in entry-level models.
Diving into the world of 3D printing introduces a fork in the road: FDM versus resin printing, each with distinct characteristics and learning curves. FDM, the technique used by printers like the Creality Ender 3 V3 SE, operates on a principle that’s akin to a hot glue gun in a robotic arm; it extrudes thermoplastic material layer by layer to build an object. This method is generally more forgiving for newcomers, thanks to its straightforward mechanics and the robust nature of the prints it produces. The materials used in FDM, such as PLA and PETG, are not only cost-effective but also easier to handle, making the post-printing process less daunting.
Resin printing, on the other hand, employs a vat of liquid polymer that’s cured by light (typically UV) layer by layer to form highly detailed objects. While it excels in precision, offering smoother finishes and intricate details, it introduces complexities in handling and post-processing, such as washing and curing the prints, which can be overwhelming for beginners. Moreover, the sticky nature of resin and the necessity for proper ventilation add layers of consideration that might steepen the initial learning curve.
First Impressions: Beyond the Box and Bolts
The assembly process was fairly straightforward, offering a hands-on introduction to the physical components of the 3D printer. An SD card, included for transferring sliced models from the computer to the printer, intriguingly contains a secret weapon—a video guide detailing the assembly and setup steps. This valuable resource remained hidden to me until after completing the assembly, a discovery made regrettably late. Reflecting on this, I suggest a slight detour from the conventional path: watch the video first to guide you through the setup, using the instruction manual as your trusty companion for reference.
The Ender 3 V3 SE offers a print volume of 220mm x 220mm x 250mm, a size that, at first glance, appears quite accommodating for a range of projects. This space is ample for most standard prints, allowing for a decent expanse in creating everything from board game accessories to sizable home gadgets. However, when it comes to larger-scale creations or ambitious designs, this limitation becomes apparent. The need to segment bigger models into smaller, printable sections introduces an extra layer of planning and post-processing. While this print volume is typical for an entry-level printer and sufficient for everyday use, it nudges against the boundaries of what’s possible, forcing creators to think within the confines of the given dimensions.
Layer One: Navigating Auto-Leveling Nuances
One of the standout advancements I encountered is the bed-leveling process of the Ender 3 V3 SE, which now includes an auto-leveling feature—a true game-changer, particularly for beginners like myself. This feature enables the printer to automatically adjust the print bed to the ideal height relative to the nozzle, addressing one of the foremost challenges in 3D printing: achieving a perfect first layer. It transcends the mere attainment of a flat surface; it ensures an optimal starting point for every print, guaranteeing that the first layer adheres uniformly and consistently across the bed.
Gone are the days of the manual bed-leveling process, a task often tedious and susceptible to error, which typically involved adjusting knobs at each corner of the print bed. Creality has streamlined this with the removal of the conventional manual bed-leveling knobs, shifting the focus to mainly relying on the auto-level feature. While there are screws on the z-rods for fine-tuning, the auto-level function performed so well right out of the box that I found no need for manual adjustments.
The Slicing Software Saga: From Confusion to Clarity
Navigating the slicing software, Creality Print, marked the next phase in my 3D printing odyssey. This software is crucial, transforming 3D models into G-code, the language that dictates every movement and operation of the printer. Initially, the plethora of settings, from layer heights and print speeds to infill patterns and temperatures, seemed daunting. Adjusting these settings became a series of small experiments, each a foray into trial and error. Over time, I began to grasp how these parameters interact, influencing the print’s appearance, durability, and time efficiency.
Interestingly, I discovered that most adjustments were unnecessary; the software’s default settings were largely effective, facilitating successful prints with minimal intervention. However, Creality Print wasn’t without its quirks and confusing elements. For instance, when faced with models requiring supports, the software would indicate the need but fail to add them upon command. Only by delving into the settings to manually select “Generate Support” could I ensure the inclusion of supports in subsequent models. This highlighted a learning point: the initial prompt wasn’t an actionable command to add supports but rather a suggestion to go back and manually add them.
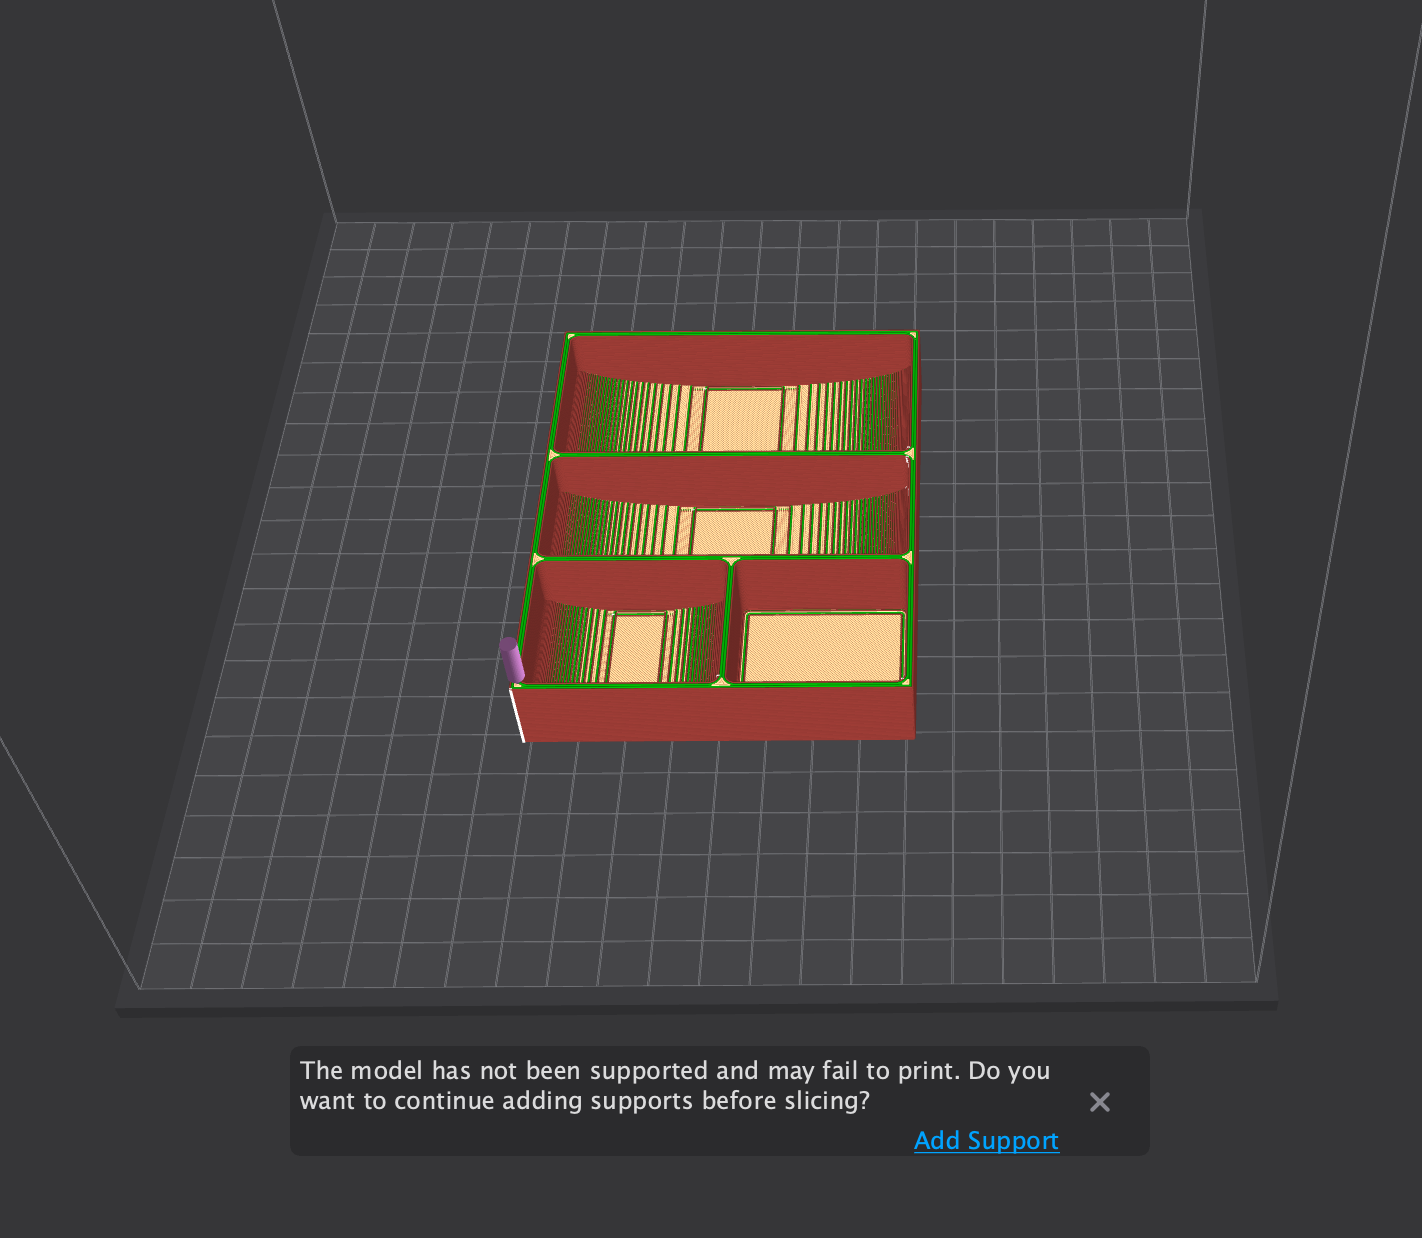
Creality Print slicing software seemingly offers the option to add supports
Additionally, while using my Apple MacBook Pro, I encountered software stability issues, with the application frequently “blinking” out of existence, which means going from an application using dark mode to getting flash-banged by my desktop wallpaper every few seconds. It didn’t always happen but when it did, it was a real pain.
All this is not a criticism of the printer itself, but rather an observation from my experience with the software bundled with it. Since the printer operates on the G-code it receives, any slicing software can be used.
Supporting Acts: The Hidden Heroes of 3D Prints
Understanding the role of supports in 3D printing was a big deal for me. At first, I thought these structures were just extra material, but they’re crucial for printing complex designs with parts that stick out or hang over. These supports help hold up the tricky parts during the print. With the Ender 3 V3 SE, printing these supports is straightforward, and they can be snapped off easily once the print is done. Learning this made me think more about how to set up my prints, including how to position the model on the print bed. This knowledge has made a big difference in how I prepare for printing and has improved the outcomes of my projects.
Game Night Makeover: From Cardboard to Custom Craft
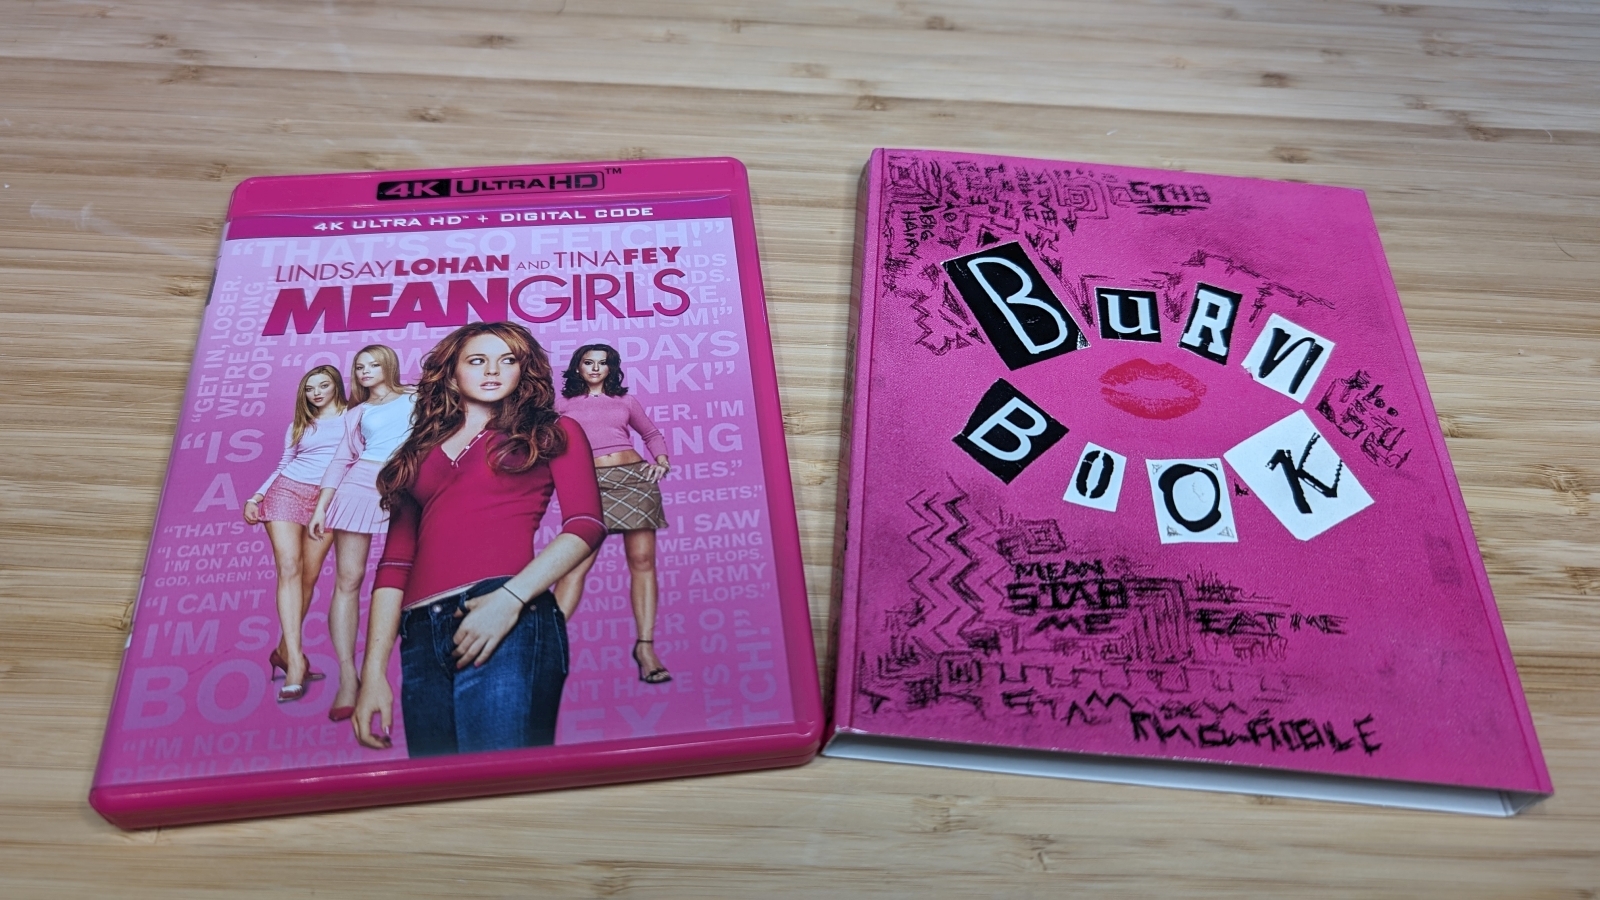
The Ender 3 V3 SE really opens up new doors for board game fans and TTRPG players. For board games, the power to print custom inserts is a huge deal. Instead of settling for the one-size-fits-all cardboard inserts that come with many games, which just have simple compartments, you can 3D print inserts that perfectly fit each game piece, card, and token. This not only makes setting up faster but also keeps everything neatly organized, making the gaming experience smoother and more enjoyable.
![]()
3D Printed insert vs the included insert
I was especially excited about this aspect of having a 3D printer. There are lots of places online to find free designs, and I’ve already picked up several custom inserts and game accessories. For example, in the game Hanabi, you need to hold your cards outward, which gets tiring after a while. By printing card holders, I made it easier to play since I no longer had to keep showing my cards throughout the game. And for Agricola: All Creatures Big and Small, having a printed insert has cut down on setup time significantly. I used to fumble with bags of pieces, but now I can just pull out the organized inserts, set up the board, and start playing right away.

Hanabi card holders
Miniature Matters: FDM’s Finer Points and Pitfalls
For TTRPGs, the Ender 3 V3 SE is fantastic for creating detailed terrain pieces, which really bring gaming sessions to life. Right now, I’m part of a Fallout TTRPG campaign, and I volunteered to print some terrain for my GM. He was looking for things like cars, trees, and rocks. My GM asked for rocks, and he got “Rocks”!
Rock Terrain
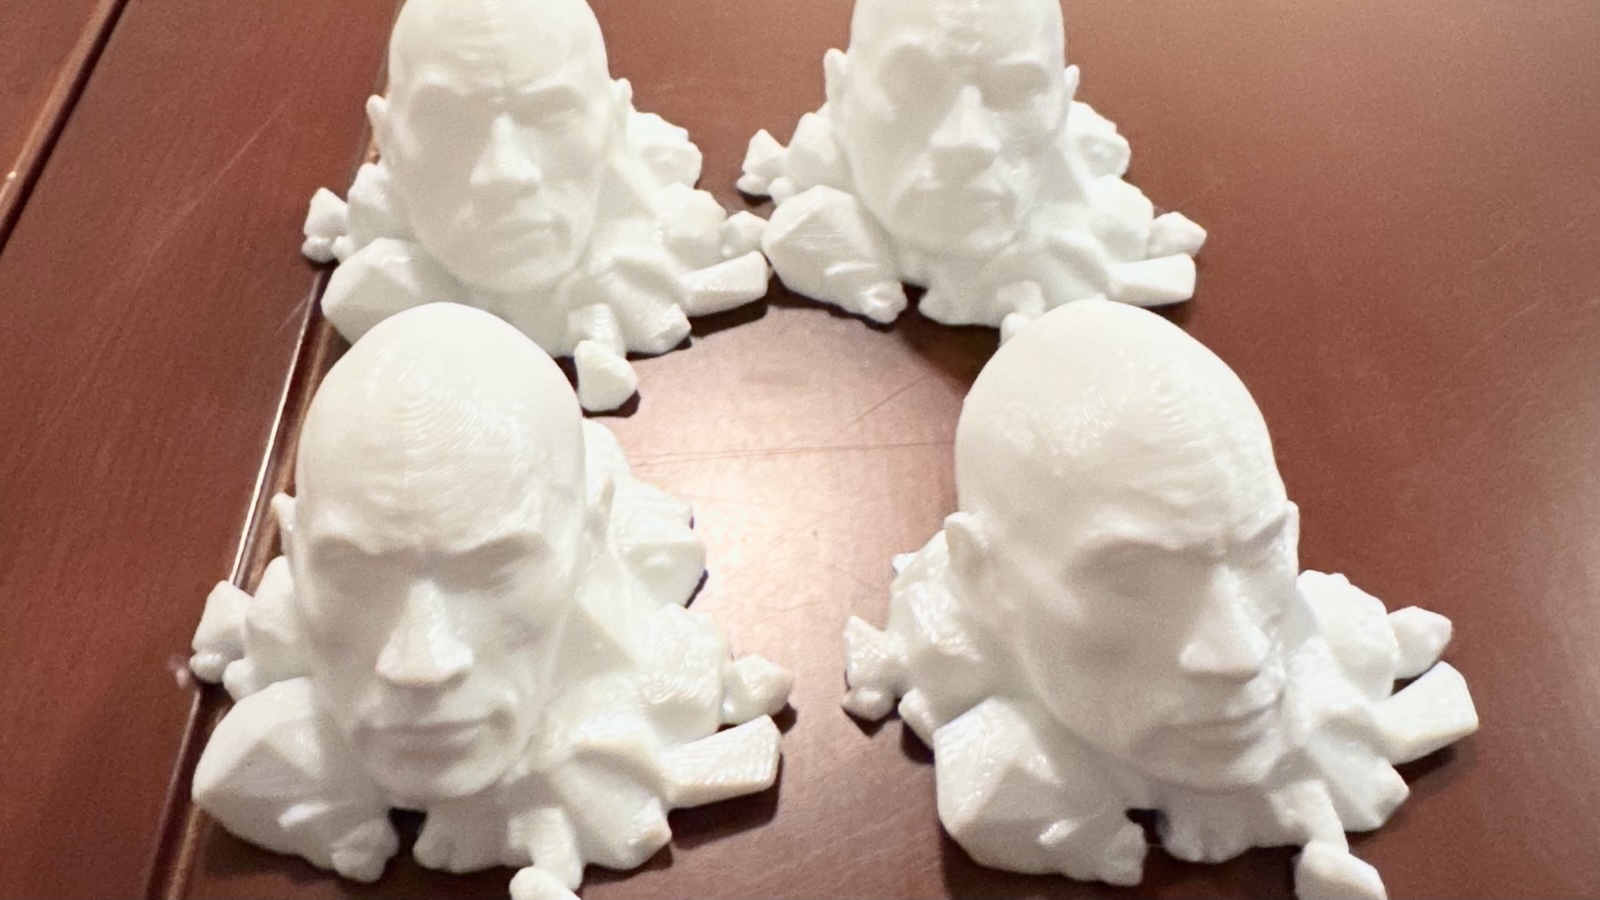
But when it comes to printing miniatures, that’s where you start to see the limits of what the Ender 3 V3 SE can do. It uses FDM technology, which builds objects layer by layer by melting plastic and pushing it through a tiny nozzle. This method is great for bigger items that don’t need a lot of detail, but it’s not the best for creating the really small, detailed figures that you want for miniatures. Those usually turn out better with resin printing, which can handle the finer details.
Ender’s Essentials: Lacking Luxuries
I noticed some features absent in Creality’s Ender 3 V3 SE that could enhance the printing experience. For instance, having a camera to monitor prints remotely would be a significant convenience. Additionally, fundamental elements like a built-in light and a filament runout sensor, which were not included, seem like oversights. These can, however, be integrated later, albeit with extra expense.
In my setup, I added a webcam to keep an eye on the printing process from a distance. This improvisation was soon followed by the realization of the need for better illumination, leading me to acquire a light bar. Installing the light bar was a bit of an adventure, requiring partial disassembly of the printer to route the wires to the power supply which turned out more complex than building the machine itself. Now in place, the light bar, equipped with a power switch, remains perpetually on, drawing power only when the printer is active.
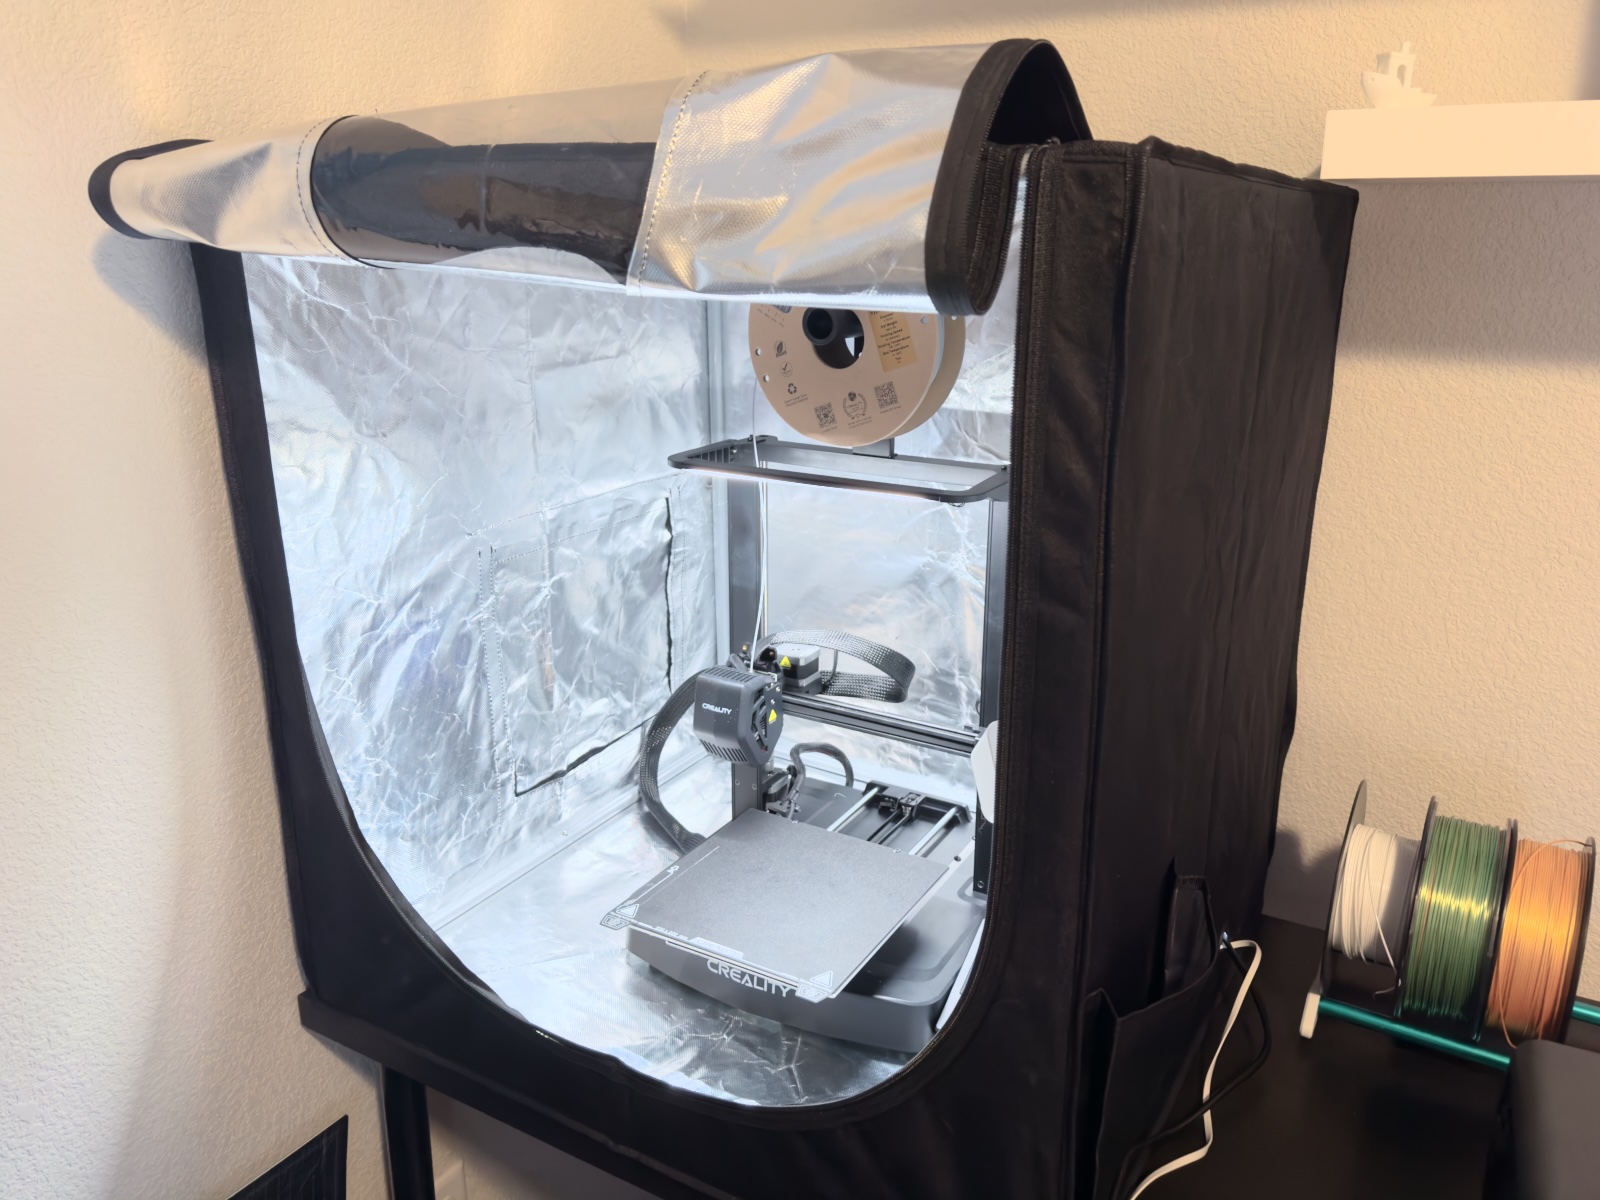
Creality Ender 3 V3 SE inside the enclosure
My household has mischief demons cats, so I felt compelled to buy an enclosure to shield the printer’s moving parts from their prying paws. The Ender 3 V3 SE, being a bed-slinger type, requires extra space at the front and back for the bed movement. This requirement resulted in an enclosure that appears considerably larger than the printer itself taking more table space than initially expected.
Looking Back and Forward
Looking back on my time with the Creality Ender 3 V3 SE, it’s impressive to see the journey from the first unboxing to fully tapping into its potential. This printer has been more than just a tool; it has been a teacher of 3D printing, patience, precision, and the importance of ongoing learning. Currently priced at $219, it offers remarkable value, considering the features it packs.
The Ender 3 V3 SE really shines as an ideal starter printer, perfectly balancing ease of use with the depth of learning needed for budding 3D printing enthusiasts. Its cost-effectiveness and straightforward setup peel away the intimidation factor of starting with 3D printing. Features like auto-bed leveling simplify the process, softening the steepness of the learning curve. While it might not have all the advanced features of the pricier models, it excels as a foundational tool, providing a robust introduction to the mechanics of 3D printing with its dependable functionality and scope for hands-on engagement.

Starting with the classic charm of the Nintendo Entertainment System, Mike ventured into the spell-slinging arenas of Magic: The Gathering. He later immersed himself in the strategy and storytelling of modern board games. His passion has taken him from digital realms to tactile tabletops, always in search of the next great game.

The Ender 3 V3 SE really shines as an ideal starter printer, perfectly balancing ease of use with the depth of learning needed for budding 3D printing enthusiasts. Its cost-effectiveness and straightforward setup peel away the intimidation factor of starting with 3D printing. Features like auto-bed leveling simplify the process, softening the steepness of the learning curve. While it might not have all the advanced features of the pricier models, it excels as a foundational tool, providing a robust introduction to the mechanics of 3D printing with its dependable functionality and scope for hands-on engagement.
PROS
- User-friendly - ideal for beginners
- Auto-leveling - ideal for beginners and simplifies setup
- Affordability - great value
CONS
- Limited QOL features - no lights or filament runout sensor
- Noise level - the fans can get fairly loud if noise is a concern
- Build volume - at 220mm x 220mm x 250mm can be limiting for larger prints unless you’re willing to glue prints together
Unless otherwise stated, the product in this article was provided for review purposes.
See below for our list of partners and affiliates: