The Varmareno Coliseum can be found in Port Brilehaven after finishing the main quest in Martira. This is where you can engage in difficult fights that earn you powerful rewards and also improve your courage.
This guide will only be covering the ranked battle mode, mostly because you can't exactly form much of a strategy for the gauntlet battle fights. The fights in gauntlet battle are a lot more random, with different amounts of each enemy type popping up across all 30 rounds. I'd just wait until you get to the very end of the game and simply breeze through the gauntlet battles once you're overpowered instead.
Before you jump in, here are a few general tips. The Coliseum is open day and night, but closed on days that it rains. Check with the weather forecast NPC on the days you plan to fight, so you can see if it'll be inaccessible. In my experience, it's best to tackle these fights when you have literally nothing else to do. Like, for instance, when all your quests are complete and you can no longer progress any current Follower ranks.
If you're stressing out about not being able to potentially finish them all before the end of the game, I'll let you in on a little secret: you'll suddenly start to have a lot more free time the closer you get toward Metaphor's conclusion. That being said, these fights do give you a pretty decent amount of Courage. If you need more Courage to qualify for a certain follower's next rank, you could justify killing two birds with one stone by taking certain fights on beforehand.
Do not be afraid to use all of your MP during these fights, even if you plan to tackle one in the day and one at night. You will completely heal in between.
I highly suggest ranking up either the Commander or Faker archetype trees to a decent degree before jumping too far into the later ranks. Buffs and/or debuffs will be extremely important in later fights.
Certification Battle: Crag Manjula
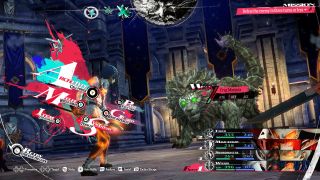
You must win this fight in three turns. Keep in mind that you won't fail the moment those three turns are up, but will instead fail after you complete the battle. Count how many turns the Crag Manjula has, and reset if you fail to defeat it before the third turn begins. The Crag Manjula is weak to strike attacks, but resistant against pierce and slash. Fire is non-effective.
Wizards are good here, as their regular attacks will weaken it and the Blizza ice skill will deal great damage. Pugilists and Brawlers are great here too, due to their skills inflicting strike damage. Knights are particularly ineffective, as the Crag Manjula deals lightning damage and it's resistant to piercing.
If you're under-levelled and need an easy win, simply go in with four Brawlers and repeatedly use Perfect Punch to perpetually inflict super effective strike damage. Use Skill Inheritance to attach a multi-healing spell to one of your party members so you can offset the life cost of Perfect Punch.
Your rewards are 25,000 money and Bronze III rank.
Bronze Rank III: Goborn King
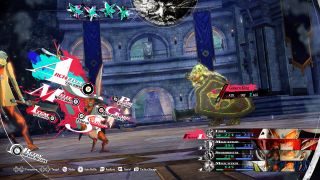
This fight can be an absolute cakewalk with a Swordmaster and a Faker. Use the Swordmaster's multi-hitting Vorpal Blade synthesis to hit every Gorborn. Combine this with a couple of other attacks that strike every enemy at once, and you'll be down to just the Gorborn King. The Gorborns don't have resistances, so any moves will do.
At this point, the Gorborn King will cast Unwavering Blade. This ups his agility by three whole levels. Cast the Faker's Dekaja ability to completely negate his buff, then just wail on him. He'll spend his entire next turn simply recasting Unwavering Blade, so no need to be fancy about it. Just rinse and repeat each turn.
Your rewards are the Man O'War gloves, some Courage, and Bronze Rank II.
Bronze Rank II: Gangaflos and Serpetias
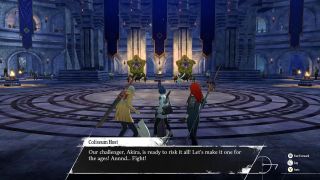
So, this fight just sees you running around the Coliseum and using your basic attacks outside of battle, like you would in a dungeon.
It should be relatively straightforward, but here's a tip: use the Mage/Wizard class or the Seeker class for your protagonist. The Mage archetype's basic attacks outside of combat have a huge hitbox, so they're great for hitting several enemies at once. The Seeker has the passive ability Chase Support, which inspires your party members to help out more in overworld combat so you can deal more damage.
Your rewards are 10 Blessed Waters, five Graced Waters, two Heavenly Waters, some Courage, and Bronze Rank I.
Bronze Rank I: Vesp and Nocross
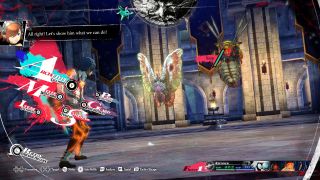
As this fight sees the protagonist go into battle solo, it can be a little tricky for a number of different reasons. You won't have access to synthesis attacks, you'll only be able to attack a maximum of two times per turn, and you might not have levelled up the correct archetypes for your main character.
It also won't help that the Nocross will inflict Forget and the Vesp will inflict both Hex and Poison, so status ailments will be a huge threat. Status ailments can stack, so make sure to counteract at least one of these. You may also want to consider using a Miraculous Medicine healing item so you can fully heal at least once.
Firstly, I'd prioritise having the right skills so you can at least attack twice per turn. The Nocross is weak to wind and the Vesp is weak to pierce, but you should be fine as long as you have at least one decent appropriately effective skill (as the fight becomes significantly easier once you defeat one enemy).
The Seeker's Cyclo ability will easily take out the Nocross in one or two turns, depending on your stats. The Magic Seeker's Cyclone will definitely take it out in one turn, but isn't necessary if you haven't unlocked or levelled that archetype up yet.
As the Vesp is weak to piercing, the Gunner's Poison Shot or Hex Shot skills would be ideal. You could also use the Magic Knight's Heavy Rush, but as you would prefer to move to the back row at the end of your first turn it's not ideal.
I'd also suggest going in with at least one accessory to counter some of the status ailments you will almost definitely get hit with. If you've gathered enough golden bugs the Elderly Entomophile outside the Coliseum will give you the Venomward Charm. This protects against both Poison and Hex, which completely counteracts the Vesp.
However, getting hit with Forget is arguably far more detrimental as it will lock you out of all your skills. For this reason, I would instead suggest buying the Forget-Me-Nots accessory from the Phantom of the Deep shop in Port Brilehaven if you aren't strong enough to kill the Nocross in one turn.
Prior to the fight, decide which enemy you want to take out first and equip the correct accessory to counteract whichever opponent you're not prioritising. At the start of the fight, move to the back row to immediately take less damage and focus on taking out one enemy as soon as possible. As long as you're using ranged attacks, like magic or Gunner skills, you won't deal less damage for doing so. You should survive at least two turns, regardless of your level or stats.
Once one enemy is down, heal if necessary. Even if you don't have any skills or attacks that take advantage of the second enemy's weakness, you'll easily be able to kill it in a 1v1 at full health.
Your rewards are the Fortune's Grasp accessory, a Rainbow Bathblossom, some Courage, and Silver Rank III.
Silver Rank III: Homo Tenta
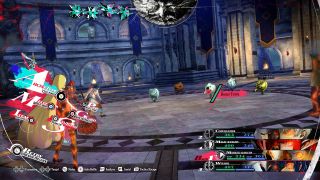
Don't let these little fellas fool you; they need very specific skills to beat, and they will pack a punch if not dealt with quickly. The Homo Tenta is neither weak nor resistant to anything. The Azure Homo Tenta is weak to Fire, and the Ochre Homo Tenta is weak to Ice. Simple so far. Now, the problem; the Platinum Homo Tenta absorbs all magic attacks but isn't resistant to any physical skills, and the Golden Homo Tenta resists everything.
I think you're supposed to go in with a build that focuses on almighty attacks, like the Merchant or the General. Alternatively, it might be expected that you use the Magic Dancer syntheses. This archetype has three syntheses that force your opponents to be weak to either fire, ice, or dark attacks. This way you could use multi-targeting magic attacks to hit every enemy with super-effective attacks at once.
Here's what I think you should do instead: go into the fight with a Swordmaster, a Faker/Gunner, and two Brawlers. Attach a fire skill to one of your Brawlers and an ice skill to another. Attach the Commander's Marakukaja ability to your Faker/Gunner. Attach the Merchant's Gold Attack to your Swordmaster.
During your Brawlers' turns, target the Azure Homo Tenta with a fire attack, and the Ochre Homo Tenta with an ice attack. This is mostly just to gain turns, but the damage helps. On the Faker/Gunner's turn, cast Marakukaja to increase your entire party's defence.
On the Swordmaster's turn, use the Vorpal Blade synthesis (this is why we brought the Faker/Gunner). This should do massive damage to every Homo Tenta (except the Golden Homo Tenta) and it will lower their attack.
With your defence increased and your opponents damage decreased, you should comfortably survive the next turn. Repeat the exact same strategy again once their turn is over.
At this point, you should mostly just be down to the Golden Homo Tenta. Although its defence is strong, its offence is not. Use your Gold Attack ability when you can to speed things up, but otherwise just hit it with whatever.
Your rewards are a Miracle Igniter, some Courage, and Silver Rank II.
Silver Rank II: Goborn, Gargoz, and Orgo
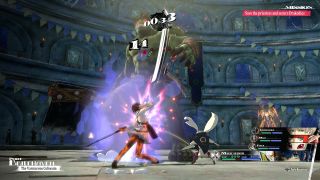
Although this is another overworld combat segment, it's not going to be as straightforward as the last one. Unlike in regular combat, there aren't any brute-force methods for this one.
If you're not at a high enough level, you simply won't be able to beat this mission in the allotted time. If you've been attempting to do so and barely come close in any of your attempts, consider this the game's way of telling you to come back at a later point.
If you have come close however, here is the only tip I can truly offer you: use a Seeker archetype for your protagonist. The Chase Support passive skill that Seekers have will make your party members help out more often, leading to much higher damage.
Your rewards are five Hero's Jewelled Roots, some Courage, and Silver Rank I.
Silver Rank I: Coliseum Mage and Coliseum Fighter
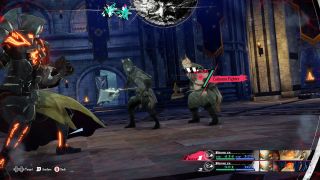
This one has two catches. First, you can only go in with two party members. Second, they both have to be Brawlers. As you would expect, this setup is heavily weighed in your opponent's favour.
Although the Mage is weak to strike attacks, Brawler skills cost HP. If you use too many, you'll decrease your HP too much and hand your opponent the victory. To make things worse, the Mage casts ice magic—which Brawlers are weak to.
There's another unfair element to this fight too. The Fighter resists strike, and will attempt to Daze your party. Getting dazed will lower your accuracy, which really sucks because the Mage can buff his party members' evasion.
The trick here is to actually target the Fighter first. Although he may be resistant to strike, he's actually weak to light magic. You're going to want both of your party members to take in a medium-strength light spell, like the Cleric's Hamaon. Consider using your party member with the highest Magic base stat for this.
On your first turn, focus entirely on the Fighter. He should die easily in four hits. Now you should be able to comfortably take out the Mage without fear of being Dazed.
Alternatively, the General skills are pretty good here. The Ice Dodge passive skill will help you avoid the Mage's attacks, and you can use the multi-targeting Almighty Megido skill to dish out some good damage. Also, consider using the Faker's Dekaja skill to counter their hit/evasion buffs and a healing spell if it's still proving to be a struggle.
Your rewards are the Full Moon Medal accessory, a Chain of Bonds accessory, some Courage, and Gold Rank III.
Note: These next few fights are tough and require you to be at a high level to beat them. It's best that you don't attempt them until the start of the ninth month.
Gold Rank III: Lina

Time for another solo fight, and this time you'll be facing off against your old rival: ex-candidate Lina. Remember how I said you should probably wait until the ninth month to tackle these fights? Well, Lina is the reason why. Without a very specific archetype that you earn after that month, this fight will be a bit of a nightmare.
Lina is weak to ice, but this is a solo fight so using an ice attack will only earn you one extra turn. Also, she'll remove any buffs you use at the start of her turn and she'll buff every single one of her own stats on her turn.
For those of you who want to take this fight on prior to month nine, try using the Faker archetype. The Faker's Roguery skill might give you three extra turns, which would be super useful. Of course, it might also just end your turn completely. It's all up to chance. Maybe try resetting a few times to get the perfect start using Faker's Roguery and spam her with ice skills. I did test this and it worked… once. Took about eight tries though.
It's clear that Metaphor wants you to use the special archetype that you unlock after month nine here. I'm about to spoil what it's called in the next paragraph, but I won't spoil anything beyond that. You've been warned.
With the Prince archetype, this fight is very, very simple. Move to the back row, use the Hero's Cry skill to gain four extra turns, and spend all four of those turns spamming Radiance. If Lina somehow doesn't die and also casts Mage Mirror, use the Prince archetype's Royal Slash skill instead. Keep using it until she dies, although I'd be surprised if she survives long enough to get another turn anyway.
Your rewards are the Jade Jian weapon, some Courage, and Gold Rank II.
Gold Rank II: Kokasados and Leogryph
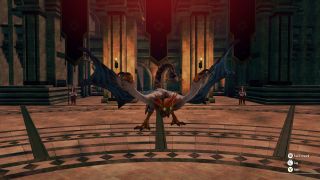
This one is another overworld battle, but with an extra annoying twist. You'll die if you take even one hit here, so you're going to want to make ample use of your dodge.
There isn't really much I can offer you in the way of advice here. This fight shouldn't be hard, as long as you're decent at avoiding the enemy's attacks. I can't help you with learning how to dodge unfortunately, but I can offer you one small, little tip; use the Prince archetype. It does great damage in overworld combat, so using it will speed things up slightly.
Your rewards are 10 Hero's Jewelled Roots, some Courage, Gold Rank I.
Gold Rank I: "Fearful Monster" (Homo Luano)
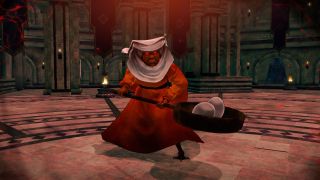
The Homo Luano is resistant to everything and it's got lots of health. It will also kill a party member every two turns. Sounds scary, right?
Nope. This guy is a pushover, provided you have a way to force a weakness onto him that is. There's a few different skills that'll help with this.
The Persona Master has Thunderhead Dance, Dance of Verdure, and Dance of Purgelight, which will force a weakness to electric, wind, or light damage. These are half-decent options. Instead, I'd recommend the Berserker and Commander archetypes. The Berserker has the Wanton Destruction skill, which will force a strike weakness. The General has Frigid Fortress Tactics, which will force an ice weakness.
After the first time you use either of these skills, every subsequent use will simultaneously weaken the boss and then re-force the weakness again. The Homo Luano will comfortably die within two turns if you use both of these skills as many times as possible.
Your rewards are the Gambler's Manual accessory, the Overlord's Sash accessory, and the quest Become Champion of the Coliseum.
Become Champion of the Coliseum fight: Guptauron
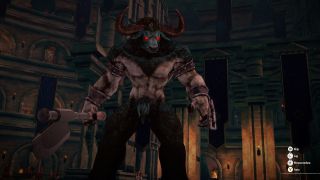
The Guptauron should, in theory, be a relatively easy fight. In practice, the Guptauron will likely prove to be a bit of a nightmare. This is the final battle in the Coliseum after all, so there had to be some kind of twist that ups the difficulty.
You have to beat the Guptauron in two turns. This guy is chunky and will take an absolute beating before he goes down, so I think using the Prince archetype here is basically a necessity.
Prior to the fight, choose one of your party members who has access to a strong piercing synthesis or a strong ice synthesis. Equip them with the Overlord's Sash accessory you won from the last fight.
At the start of your turn, use the Prince's Hero's Cry as soon as you can and gain four extra turns. Use the Trickster's Vidyartha skill once to lower the Guptauron's defence by two levels. Now, with the party member you equipped the Overlord's Sash accessory on, use your synthesis attack.
You probably just did something in the range of 4,000–7,000 damage with that one attack. That's the Overlord's Sash at work. It triples the damage of any synthesis skills. The Guptauron will probably die before he even starts his turn.
Your reward is the Yggdrasil Crown accessory and the satisfaction of having bested every challenge that the Varmareno Coliseum has thrown your way.

 2 months ago
134







![Anime Reborn Units Tier List [RELEASE] (November 2024)](https://www.destructoid.com/wp-content/uploads/2024/11/anime-reborn-units-tier-list.jpg)
